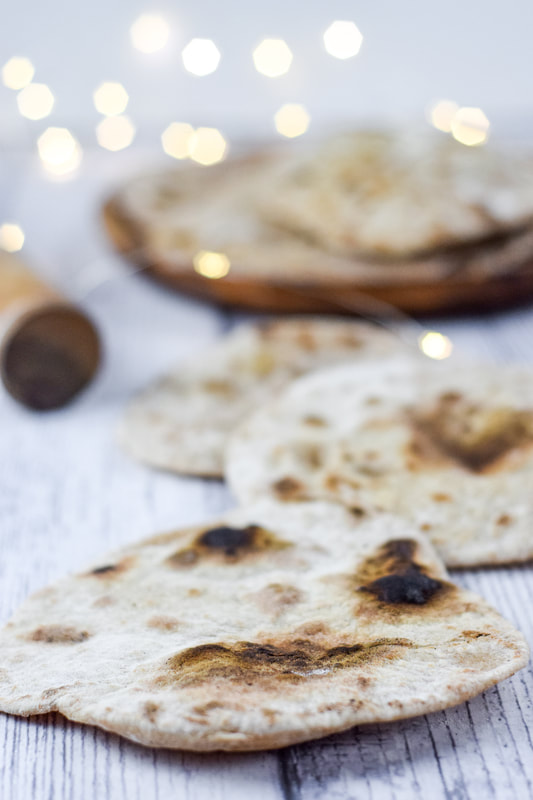
 Chapatis are a type of flatbread or "roti" common in India. I remember the first time I made and ate Chapatis was in 2nd year Culinary School. It was the international rotation. We really did cook our way around the world for a few weeks. What struck me in my memory about these was how ridiculously simple they were. Just flour, water, salt and typically brushed with ghee (i used earth balance spread) I remember making them at home a lot for a stint after we made them in school, and really I should make them more often now. What a tasty treat. I like it just as much as naan honestly and it takes a fraction of the time. They are typically made with 100% whole wheat flour. I like that they lend well to being whole grain without actually tasting like it. (not that I dislike the taste of whole wheat, I love it, but you know what I'm sayin). They are the perfect vehicle for mopping up spicy curries. 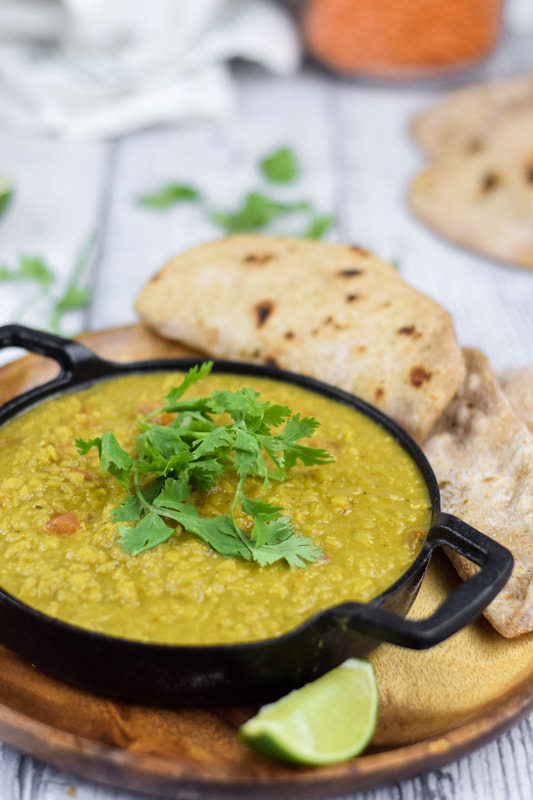 Recipe:Yield: 12 Chapatis Ingredients:
Method:
My recipe for Red Lentil Dhal with Coconut Milk is delicious, inexpensive, and perfect for scooping onto chapati.  You can also see how I make chapati in my YouTube Video for Dhal & Chapati
0 Comments
Yield: 1 x 8 inch tart
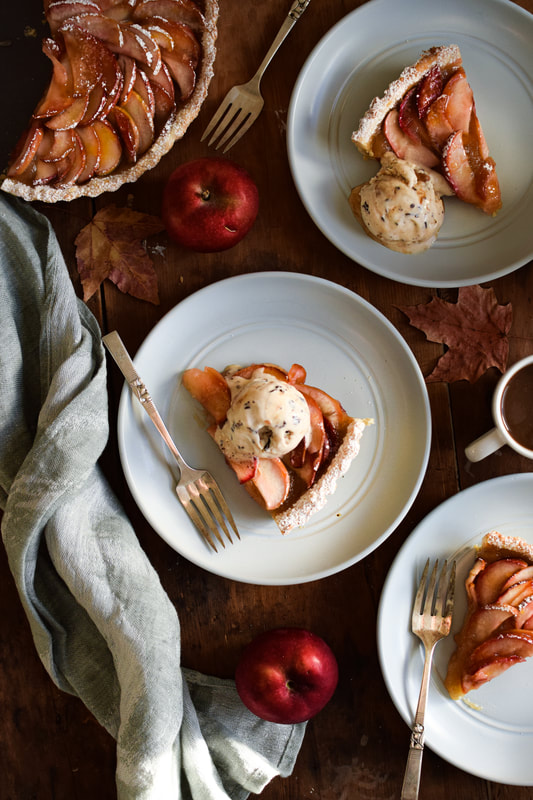
A classic French Tart is a beautiful thing. I first fell in love with tarts, like truly developed an affinity for them, when I was in my early 20s (before culinary school) watching food network TV all winter. Specifically French Food at Home with Laura Calder. Her cooking style had a pretty big impact on me. It was for me visually stunning, and at the time exactly the type of food I was really wanting to make in my own kitchen. There was a comfort to her food but also an elegance. I own all or most of her cookbooks and she goes into detail about tart bases in at least 2 of them. Different recipes for creamy tarts, fruit tarts, and galettes. Some you press in the tart pan in pieces, others you want to roll out with your rolling pin. Mix your dough by hand, or in a food processor. So, I guess all of this is what runs through my mind when I think about any kind of French Tart.
Even though how I eat has changed as far as what I consume, everything I love about making and eating tarts is possible. I just had a slice of this vegan apple tart, alongside a scoop of "So Delicious" (the name doesn't lie!) Cashew Caramel Ice cream. It doesn't taste vegan. It just tastes damn good. The only thing I want to try to improve this tart, is some kind of wash to keep the bottom crust crisp. The edges keep their texture, but the bottom does soften a bit. Typically, you'd brush on some egg white to seal the crust, I thought about using aquafaba (liquid from a can of chickpeas and is often used as an eggwhite substitute for things like making vegan meringues) but I have yet to try it. I couldn't find any information online (after looking briefly) to see if anyone else has tried doing this with success. Anyway, I solved my perfect texture dilemma by sprinkling on some toasted pecans to give me the crunchiness I was craving. I still really enjoyed this apple tart regardless, and I would make it again as is. Again, caramel ice cream was perfect (or I suppose vanilla ice cream with a caramel drizzle), and pecans are a nice touch no matter how the crust turns out. Add all the delicious things!! 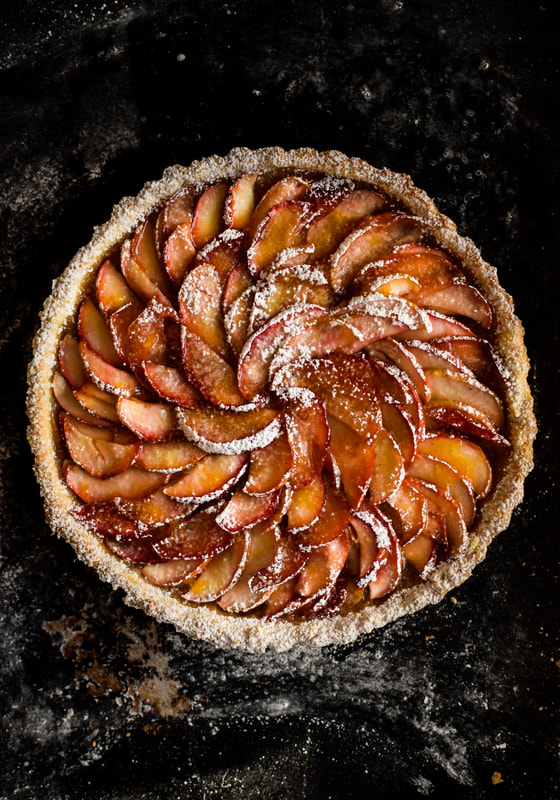
Recipe French Apple Tart (Vegan)
Ingredients:
Shortcrust Pastry 1 1/2 cups flour 1/2 cup cold vegan butter 1/4 cup sugar 1/4 tsp salt 1/4 cup ice water Filling 1 1/4 cup unsweetened apple sauce. 2/3 cup icing sugar 1 tsp vanilla 1 tbsp corn starch 3 apples, cored and sliced a little less than 1/4 inch thick (I didn't peel mine) (if they are smaller 3, if really large 2 would be enough) 1 tbsp vegan butter 1/4 cup sugar Method: Pastry Shell
Recipe Difficulty: Easy
Recipe Tags:
These Charger Plates are what I use in the photo above from Fodory. I love them!
Use code 10OFFTrisha 
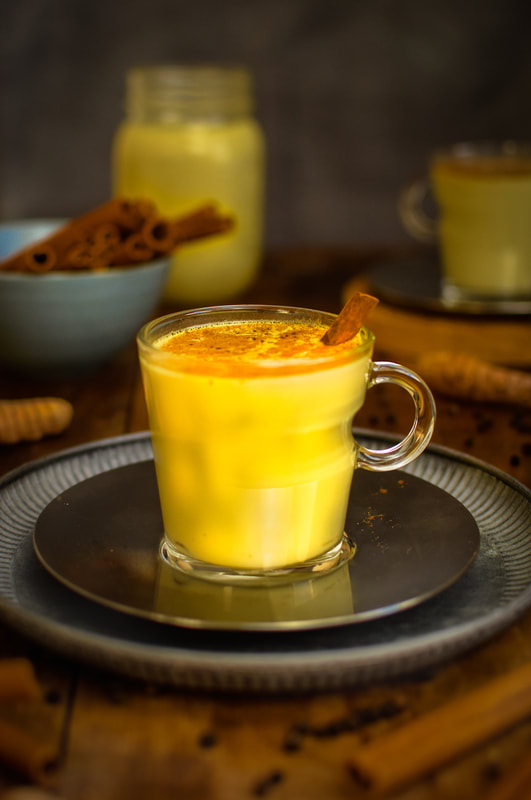
About Golden Milk
Golden milk has a long history in traditional medicine in South Asia and is believed to have originated in the ancient Ayurvedic medical system in India. Turmeric, one of the main ingredients in golden milk, has been used for medicinal purposes for thousands of years in India and other parts of Asia. It is mentioned in ancient Ayurvedic texts as a natural remedy for a wide range of health conditions. The use of turmeric as a natural dye for fabrics and food is also mentioned in ancient texts. The exact origin of golden milk as a drink is not clear, but it is likely that it has been consumed for centuries as a way to incorporate the health benefits of turmeric into the diet. In recent years, golden milk has gained popularity around the world as a natural, healthy drink. Golden milk is traditionally consumed as a bedtime drink is believed to help reduce inflammation and improve digestion. It is also sometimes used as a natural remedy for colds and flu. Golden Milk Recipe Notes This golden turmeric milk is something I revisit every time the weather gets cooler. If you are a fan of chai tea lattes this would be right up your alley. Soy milk (or fav plant milk) and coconut milk are infused with fresh turmeric, ginger, cinnamon sticks, star anise and black peppercorns. A touch of maple syrup is added at the end to help balance heavy spice, or to sweeten it up to your liking. Golden Milk does feel like a treat to me, and I love it, but I also feel like I'm putting something good into my body. I prefer not to drink copious amounts of coconut milk, so I like to serve this golden milk in small mugs, piping hot, with maybe a sprinkle of cinnamon on top.
What is Turmeric?
Turmeric is a flowering plant from the ginger family. It has been used medicinally for thousands of years in India and China. It was even used in religious ceremony, it's bright yellow colour symbolizing the sun.
The claims surrounding the use of turmeric for medicinal purposes continue today. This is because of a compound found in turmeric called curcumin. It contains antioxidants and is shown to have anti-inflammatory effects. Recipe:
Ingredients:
Method:
|

Author
Hey! I'm Trisha Archives
February 2024
|


 RSS Feed