RECIPE NOTES
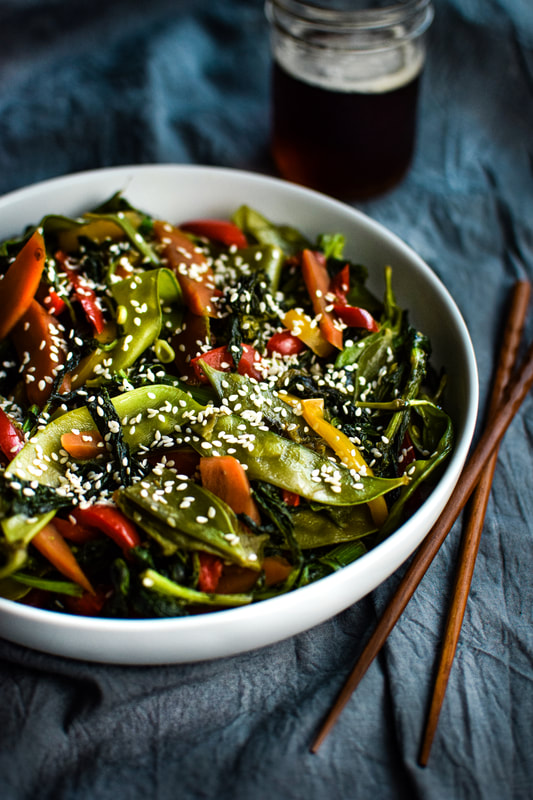
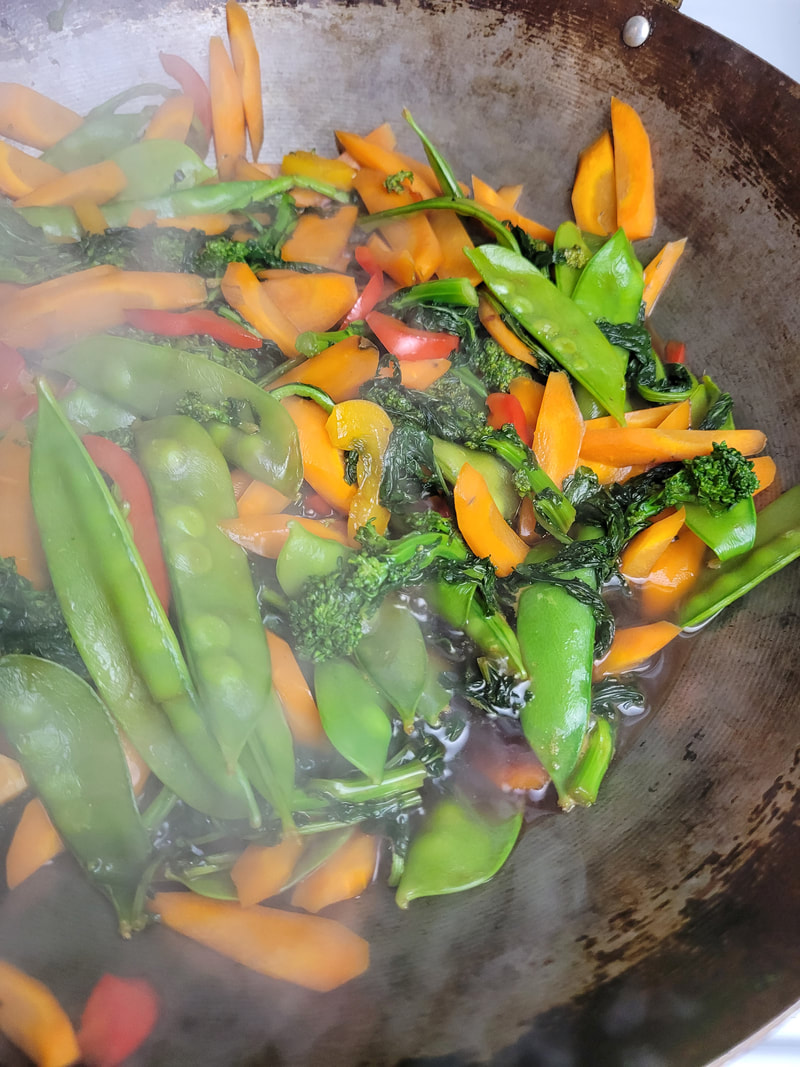
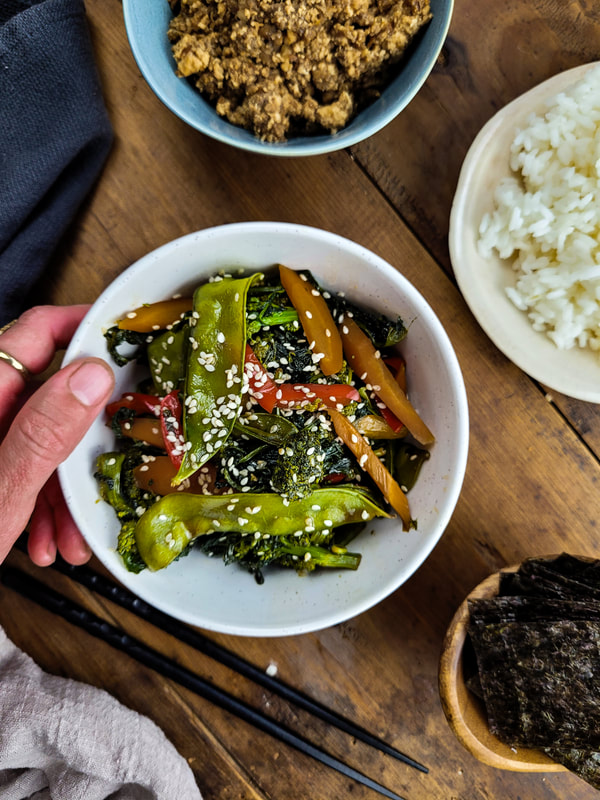
Kinpira yasai is a traditional Japanese dish that features stir-fried vegetables, typically root vegetables such as burdock root (gobo) and carrots. The dish is flavored with soy sauce, mirin (a sweet rice wine), sugar, and sometimes sake or dashi (Japanese soup stock). Sometimes, other vegetables like lotus root, mushrooms, or bamboo shoots are also included. The vegetables I'm using The first time I saw this recipe was in a cookbook I have called "Japan Easy", I actually have a Spanish copy, so it isn't the easiest for me to follow along but I know the book is sold in English as well. Anyhow, the vegetables that are called for in the book are "long broccoli" which I assume is rapini, carrots, snow peas, and red pepper. When I go to the grocery store, rapini is quite expensive so I more often opt for regular broccoli. The recipe uses four carrots, I prefer less carrot, and I like to add celery to mine as well. Moral of the story, you can use whatever vegetables you like. I also don't measure my sauce ingredients anymore, I am decent at free pouring and I just keep the ratio in mind. Cooking Tips This is definitely something I break out my wok for. I get it nice and hot with a drizzle of oil, and then add the vegetables. Typically when I make stir fry I like the veggies to be on the firmer side, but with this dish I take them a bit further than I normally would. They still have texture, but are just softened a bit more than normal. 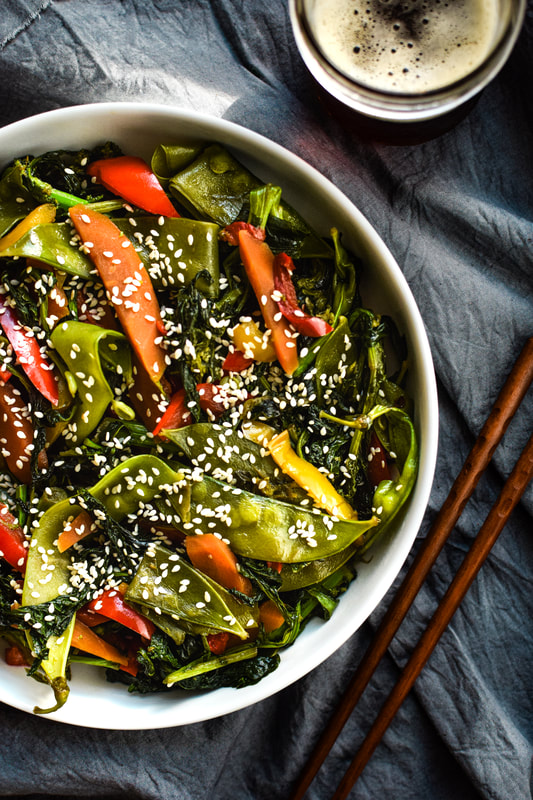

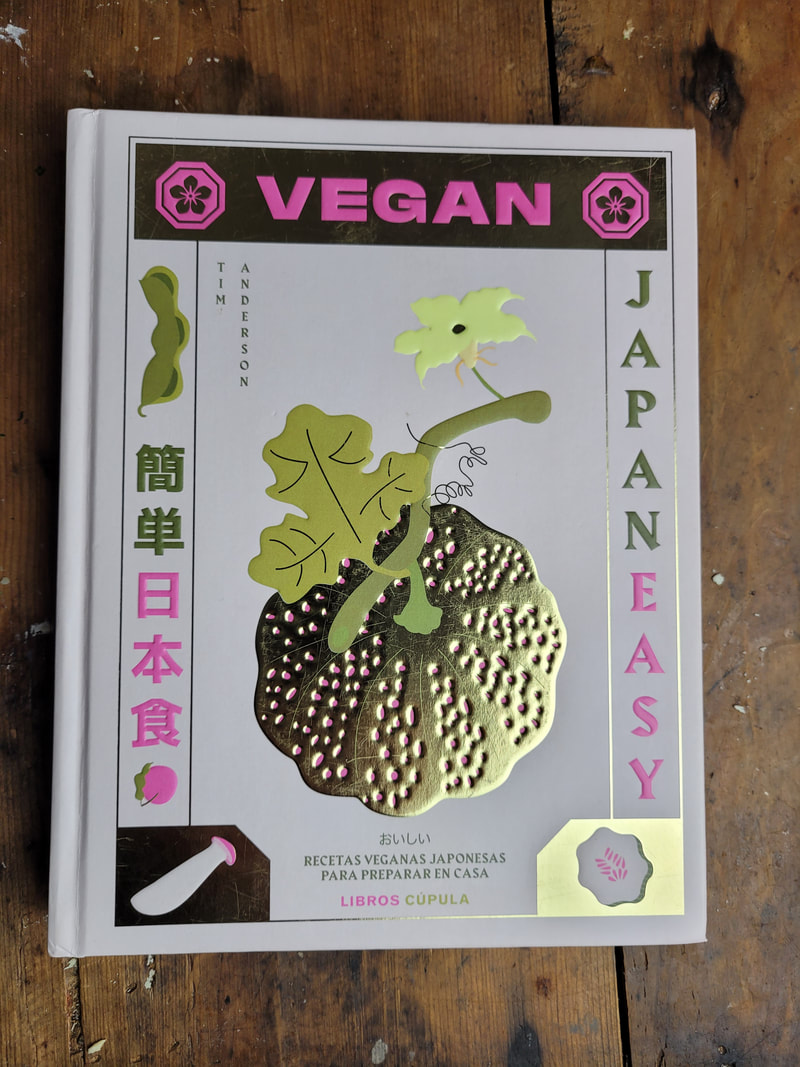
I have the Spanish copy of Japan Easy cookbook, I really love it. I haven't tried many of the recipes, but I am looking forward to. I have another vegan Japanese cookbook that is a bit more involved and I would say "complicated" for a beginner (I'm a beginner when it comes to Japanese ingredients and terms), but this "Japan Easy" cookbook comparatively, definitely seems to be true to it's name. A good starting point for anyone interested in some simple Japanese Vegan food.

Side Dishes I like to make with my Kinpira Yasai
Sushi Rice I love making a pot of sushi rice along side. If you have never made it before, it isn't hard. You make a simple seasoned rice vinegar by heating it with a bit of sugar and salt, then fold it into the cooked sushi rice. The rice is sticky, a bit sweet and bright. Vegan Beef I often will just grab a pack of ground round (veggie ground beef), and the supermarket, I pop it in a pan to heat it up and I will either just start adding soy sauce, brown sugar, sesame oil, garlic, ginger etc on the fly to taste, or if I have a batch of my Korean BBQ sauce on hand, I will heat it up with some of that, letting it reduce. Instead of ground round, you could use tofu, or a combination of tofu and plant based meat. I tend to switch it up based on what I have, or what is on sale at the supermarket. How to Eat This meal can be served hot or at room temperature. Either way, I serve it with a pile of nori on the side cut into palm sized squares. I spoon in a bit of rice, vegetables and beef, and then pop it in my mouth in one bite. It's like a little Japanese inspired taco and the combination of all the components has become a meal I crave now and again. It's really simple and satisfying.
Hey friends! This page contains affiliate links. If you make a purchase through one of the links I may earn a small commission at no extra cost to you. Thanks for your support.
0 Comments

Recipe Notes:
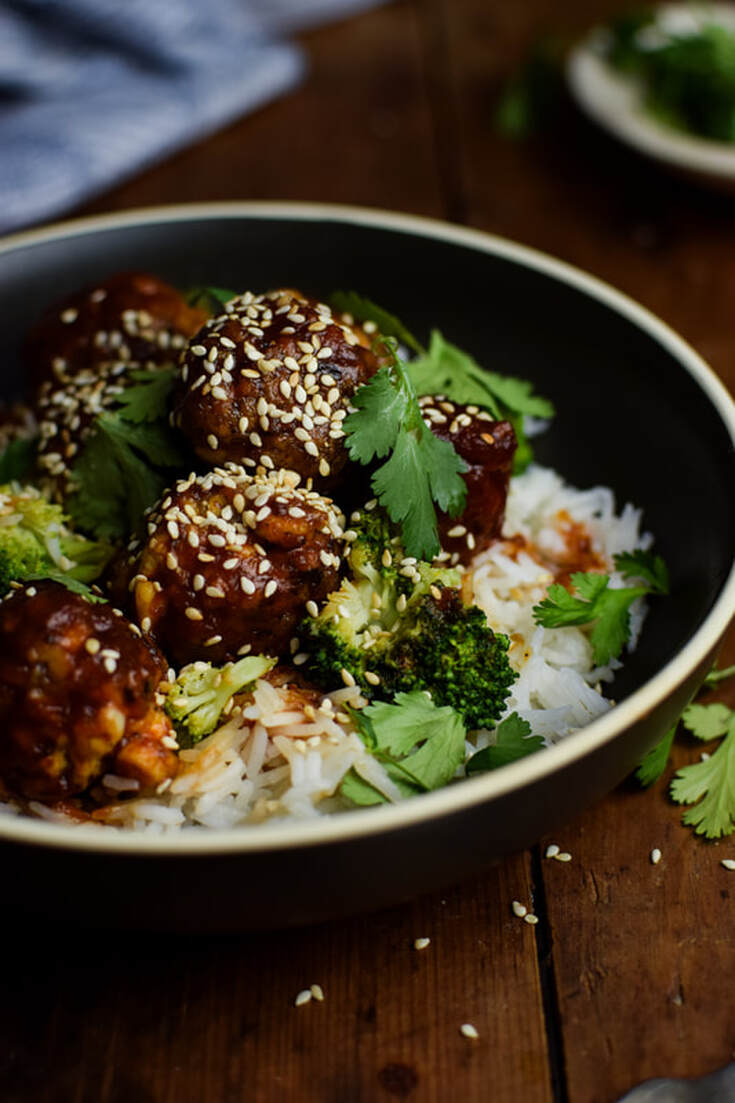
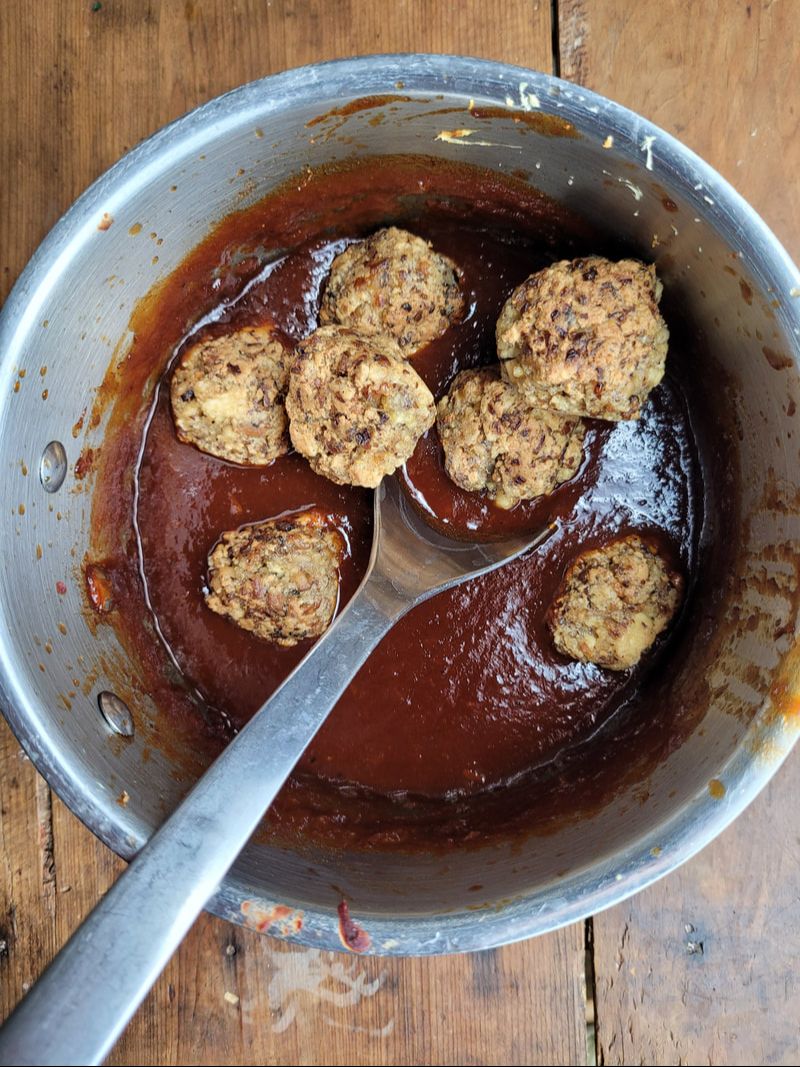
Every now and again I develop a recipe that I am extra excited to share. This is one of them. Using tofu to make meatballs is incredibly simple, and the results are great. Adding shiitake mushroom, shallot, garlic and ginger to the tofu mixture adds a lot of flavour. Then the balls get browed in a pan at which point they definitely become "meaty". The meatballs along with the Hoisin & 5 Spice Sauce, really remind me of the meatballs my mum made when I was growing up. I wasn't even thinking about them before hand! I remember hers being a sweet sauce that began with ketchup. It had brown sugar, soy sauce, and I can't remember what else, but we always gobbled them up over rice probably with a simple cooked vegetable like broccoli. The flavours here are a bit different of course, but nostalgic vibes none the less. Serving Suggestions I like to eat the meatballs over rice with steamed broccoli. Since these are tofu meatballs, they are a lot lower in fat than a meat based meatball would be. I find the final dish needs an addition of fat just to round everything out. I like to drizzle some sesame oil over top of everything, and a generous sprinkling of sesame seeds. A sprinkle of fresh cilantro is nice too. I also have served them as finger food (ok toothpick food), simply tossed in the sauce, lined up on a plate and drizzled with sesame mayo, sesame seeds and cilantro. For the mayo I just mixed some sesame oil into vegan mayo until it tasted good, with a bit of water to thin it out a bit. Into a squeeze bottle, a tasty garnish. 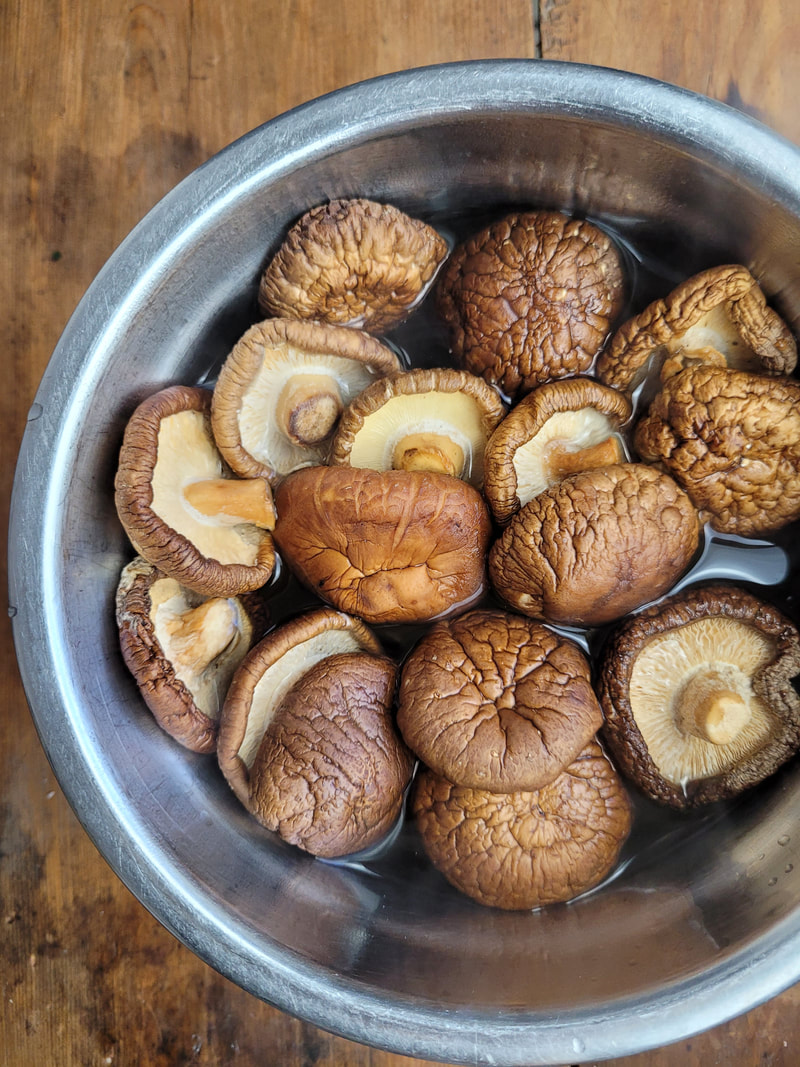

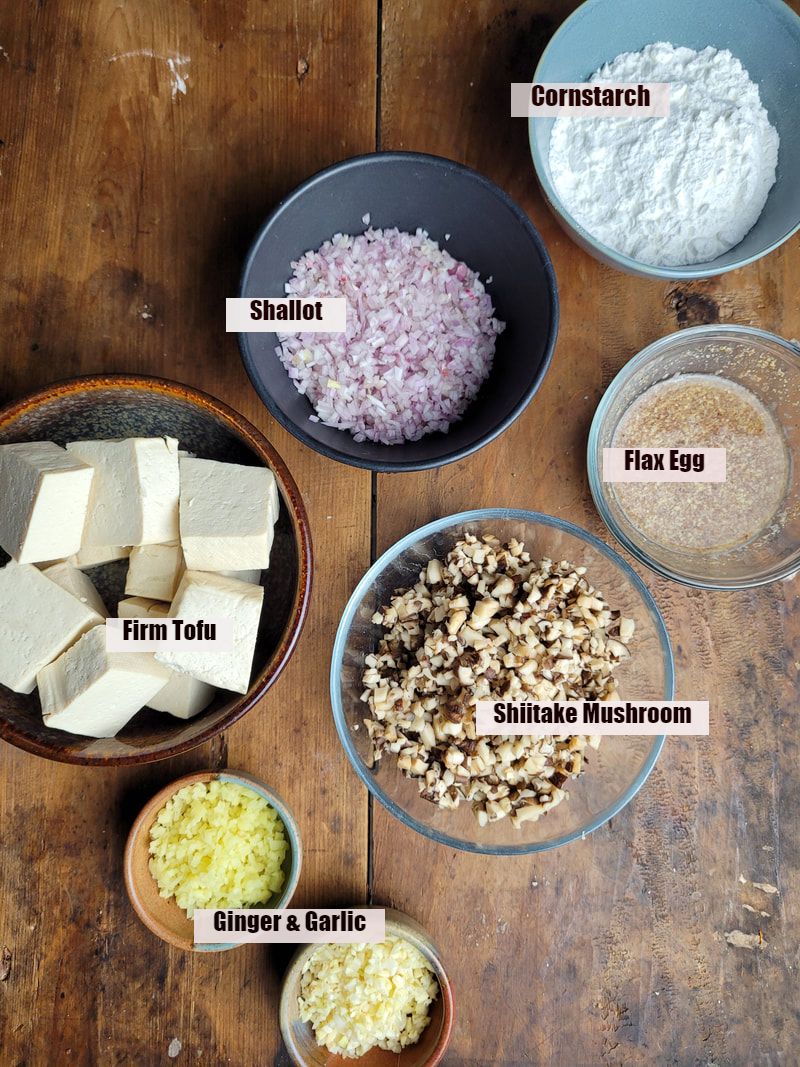
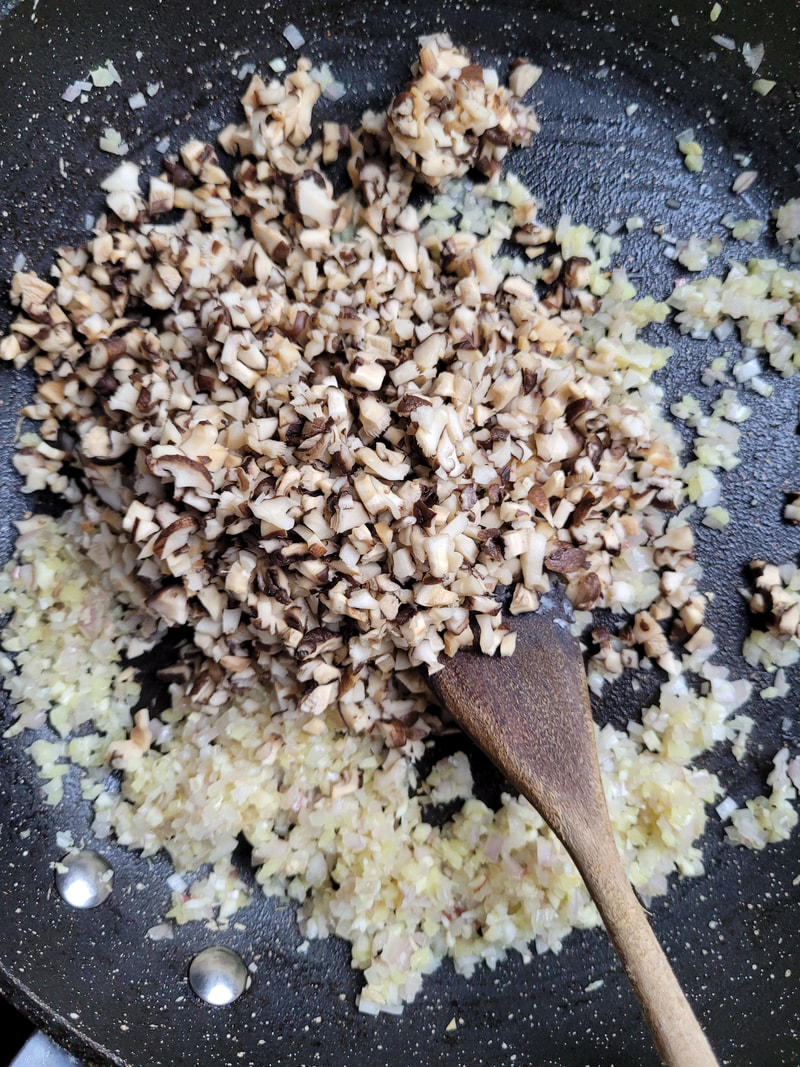
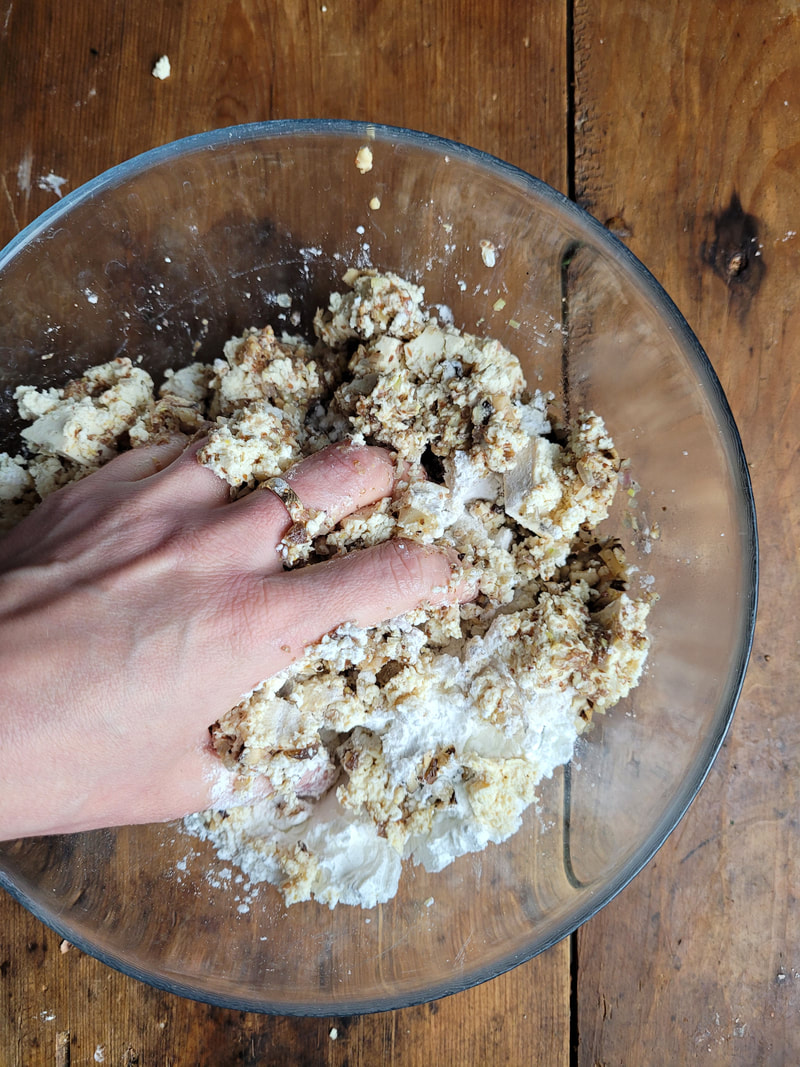
1. Rehydrated dried shiitake mushroom, shallot, garlic and ginger get softened in a pan with a bit of olive oil. This gets mixed together with tofu, cornstarch and "flax egg" (ground flax seed mixed with water).
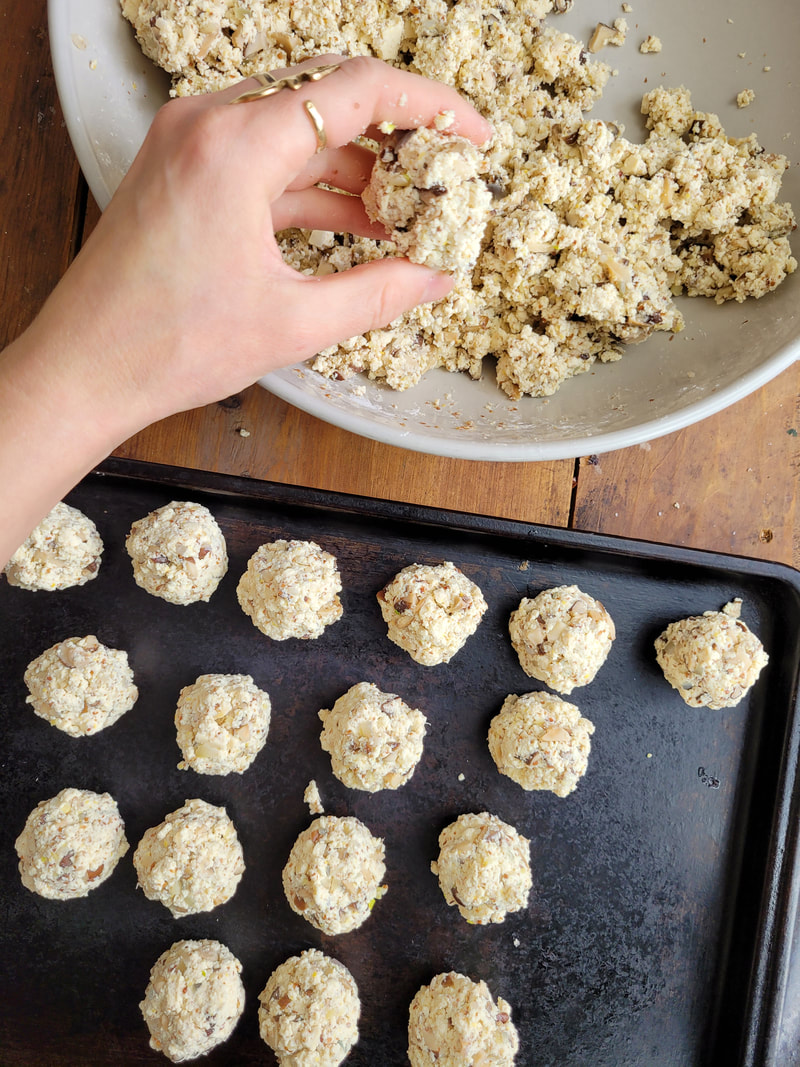
2. Form the tofu mixture into balls, and then brown in a pan with olive or veg oil for about 10 minutes over medium heat. (I turn on a pot of my 10 minute basmati rice and that's approximately as long as the meatballs take to brown)
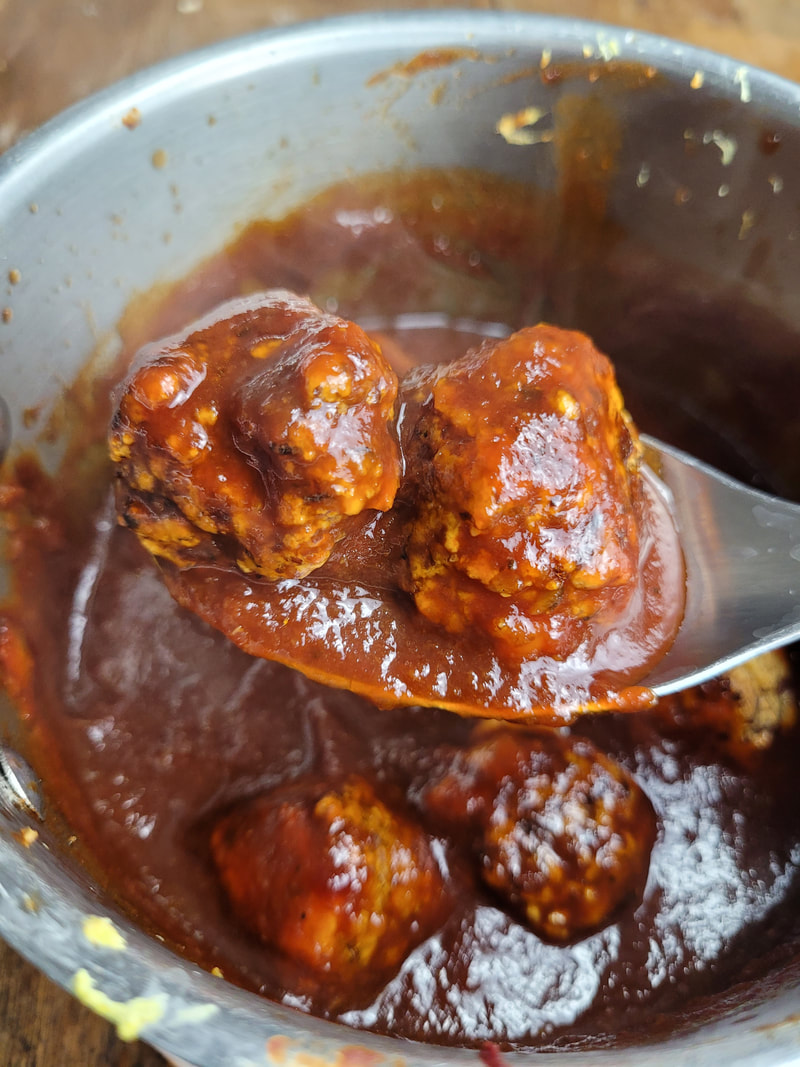
3. Add the meatballs to the Hoisin & 5 Spice Sauce to coat. Serve over rice with steamed broccoli, a generous drizzle of sesame oil, lots of sesame seeds and fresh cilantro.


Recipe Difficulty: Easy
Recipe Notes
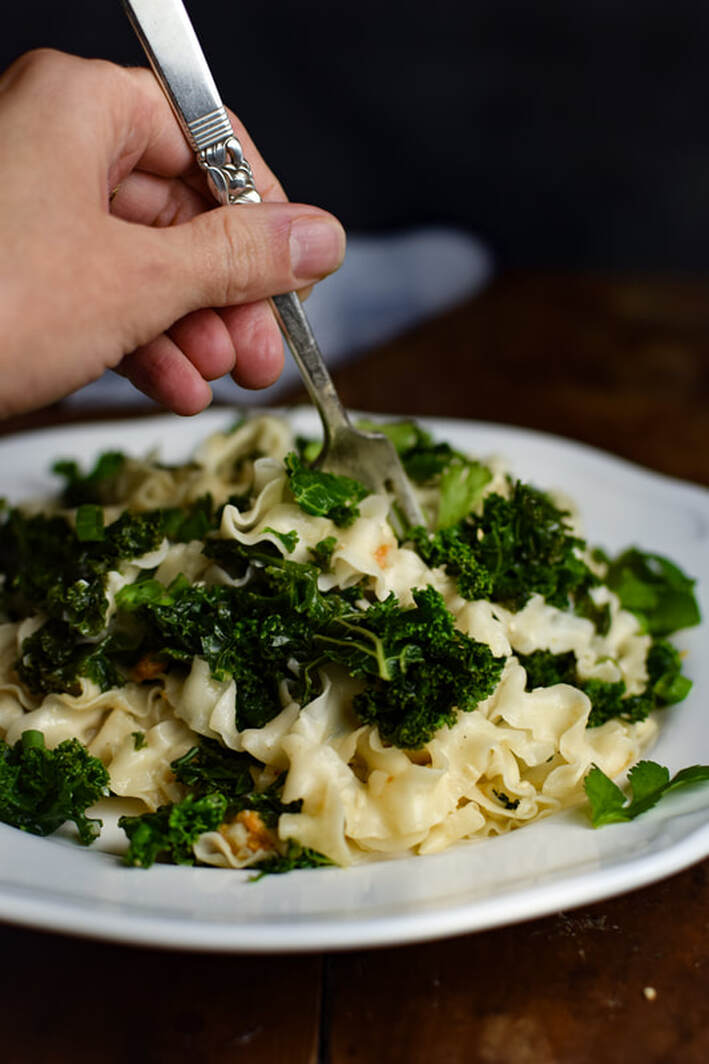
These noodles aren't going to win an award for their visual appeal, but in this instance, I don't care about that. It's a delicious meal, and has become something I make for myself almost weekly. Once you have a batch of the Szechuan chili oil made, you can make this meal in less than 30 minutes. The chili oil is best after it sits a week or so, but a batch lasts a really long time, and is delicious drizzled over all sorts of dishes for added flavour and heat. When I'm getting low, I make another batch immediately. This recipe isn't my creation. It is from "To Asia with Love" Cookbook by Hetty McKinnon. I suppose I have adapted the method a bit, and I gravitate towards using peanut butter instead of tahini, and kale instead of broccoli or brussels sprouts. I've tried all the suggestions in the book. I also like to add in cubed tofu sometimes. I've tossed in eggplant before as well. It doesn't really matter. As long as you end up with ramen noodles that are coated with delicious spiced oil. nut butter, add the right amount of noodle cooking water so the noodles aren't dry, you will have something tasty to look forward to. I don't really measure all of my ingredients, so the recipe is a bit loose in that sense, made to taste, but it's really easy to do. Another option (pictured below), is to make a batch of my shiitake tofu meatballs, brown them in a pan and serve them on top of the noodles. They are crispy on the outside and I just love them here. I make double batches of these meatballs and keep them in my freezer. You can cook them from frozen. The recipe is simple and will be better than anything you can find in the freezer section at the store. They are suited to recipes with an Asian flare, I tried them with marinara and spaghetti just for fun, but the flavours aren't right. As you can see with my szechuan noodles, I often switch up the veg and type of noodles I use. Anything goes. It's meant to be a quick meal when I'm short on time, using what I have on hand. (I always make sure I have stuff to make some variation of this dish...I eat it once a week!) 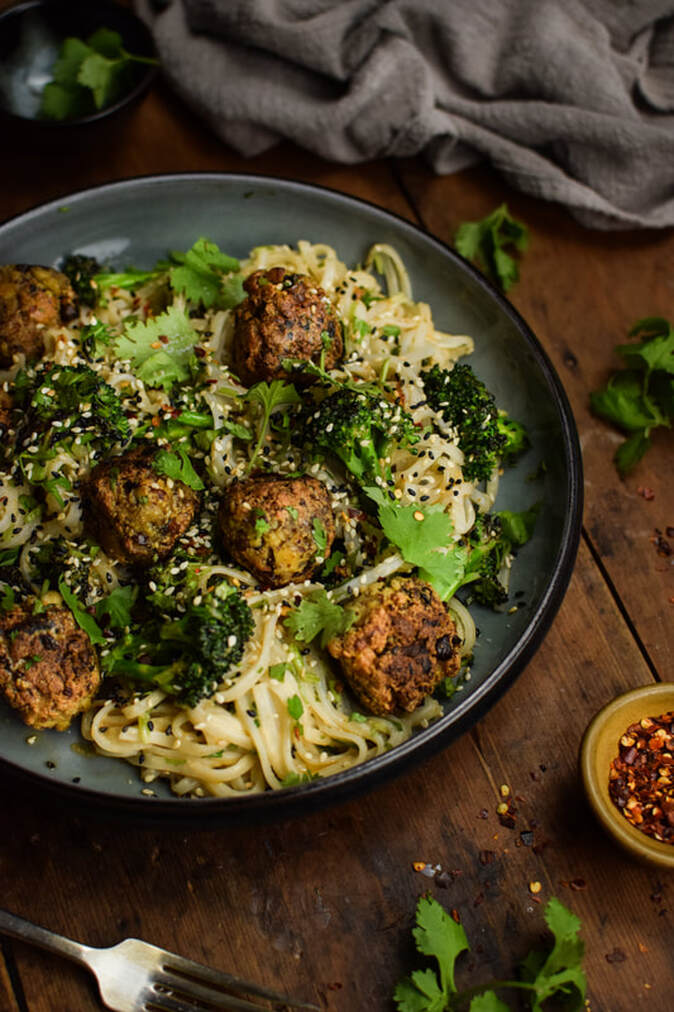
1. Make Szechuan Chili Oil a head of time.
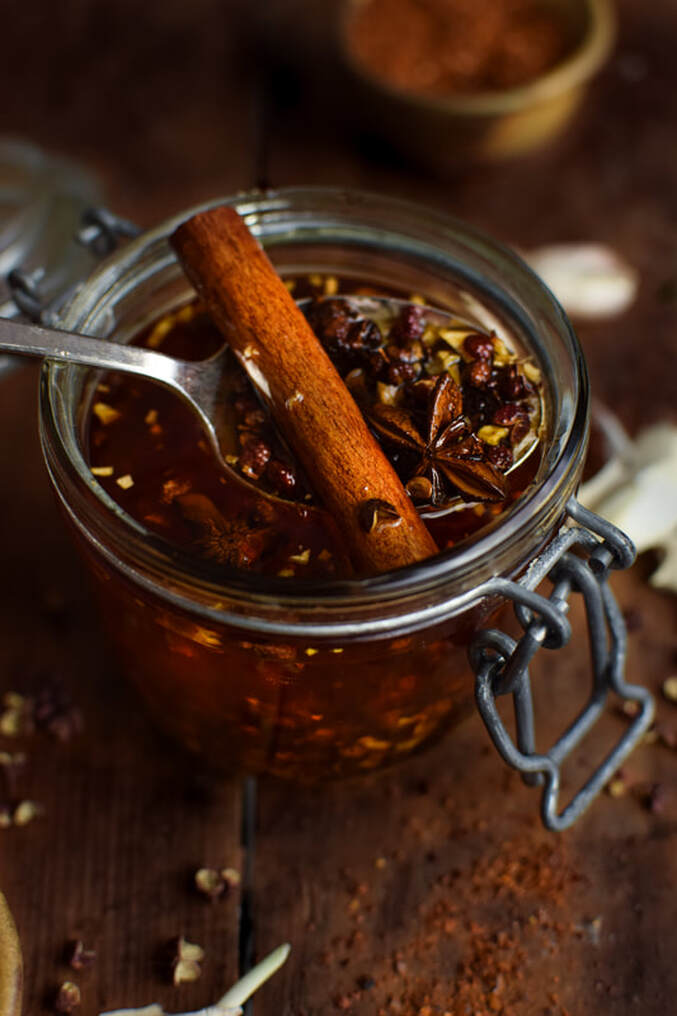
The star of this recipe is this Szechuan chili oil. It's so delicious, and takes the guess work out of making a tasty bowl of noodles when the craving, or need for a quick meal, strikes. It does have heat, so if you aren't a fan of spice this might not be for you. Even though I find it has a decent kick, and I consider myself to have a low to medium tolerance for spice, there's something different about this compared to just adding a butch of hot sauce to something. It's flavoured with Szechuan, gochujang powder, chili flakes, chopped garlic, ginger, star anise and cinnamon, and is incredibly delicious. This is the only make ahead part. While you can start using the oil probably after a couple days, and I do, but the flavour and spice improves and deepens over time. For this reason, I don't strain the oil right away, and instead if I want to use some, I just spoon a little bit through a strainer because I want to avoid pieces of the peppercorn in my food. I tried that and the chunks of Szechuan peppercorns were just kind of harsh and not delicious. After a month or so I did strain the oil into a clean glass jar so it was easier to utilize. You can find Szechuan peppercorns and gochugaru (also known as korean chili powder) in Asian markets (I just ask for help locating ingredients when I go), or possibly in the international section of some grocery stores. I'm sure you could find them both on Amazon, if needed, too. 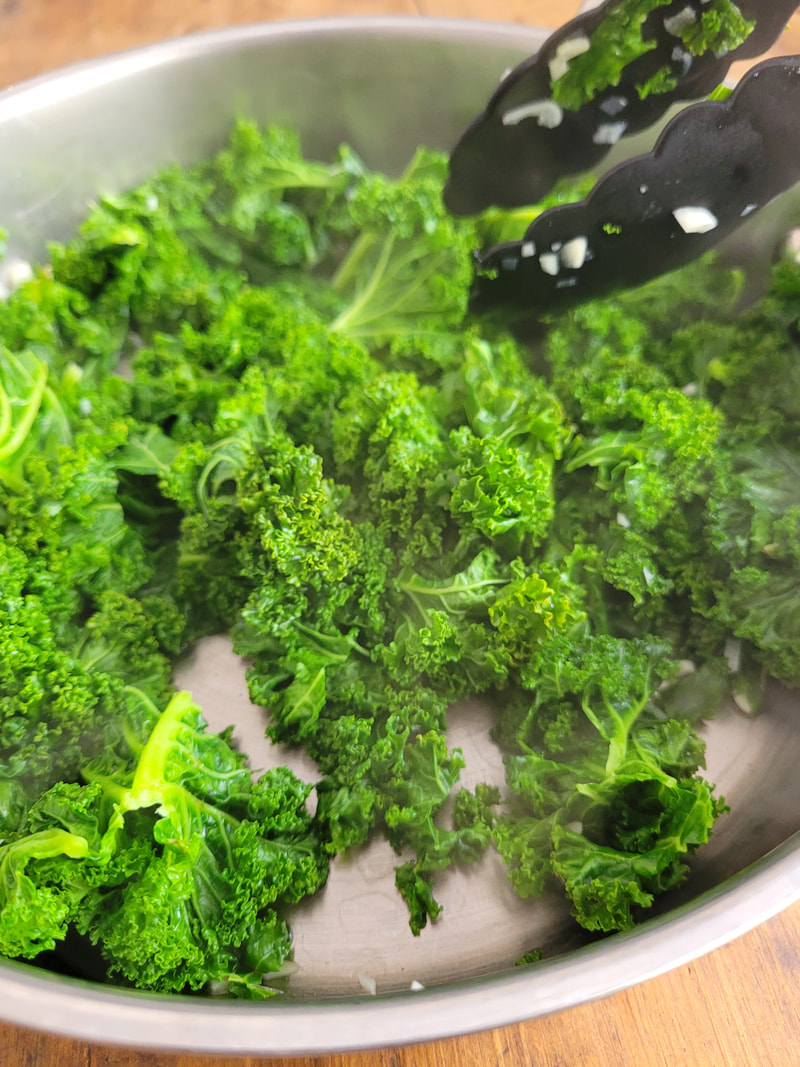

2. Cook the Kale
First, cook kale in a bit of water. I add in a few cloves of chopped garlic, too. The original recipe calls for charred broccoli. There is already a lot of oil in the recipe, so I prefer to keep my greens oil free by steaming them in a pan. Just add a splash of water at a time until the kale is cooked and wilted. Cutting the kale in small pieces makes it easier to eat and chew.
3. Cook the Ramen Noodles
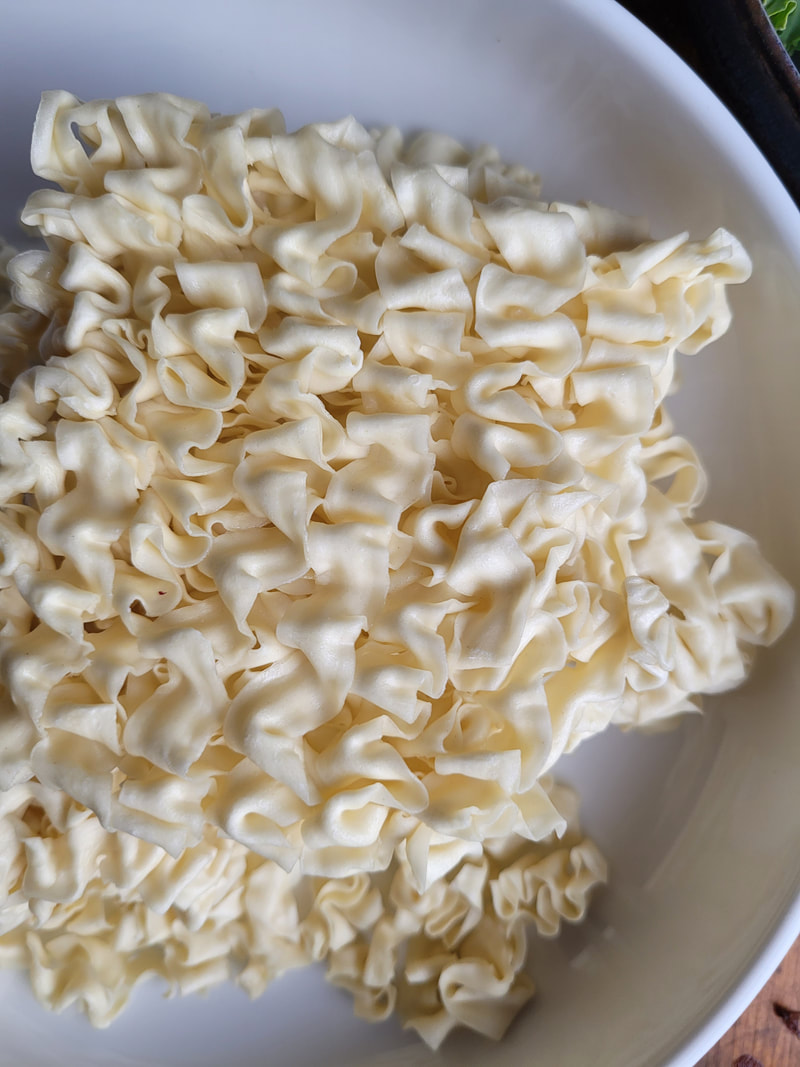
Grab a couple "pieces" of thick cut ramen noodles (I don't know what to call them, squares? they come pre-formed in a big bag. Pretty sure it is a standard thing) The ones I buy are 63 grams each. Cook them in boiling water with a bit of salt. Don't dump them out into a strainer. 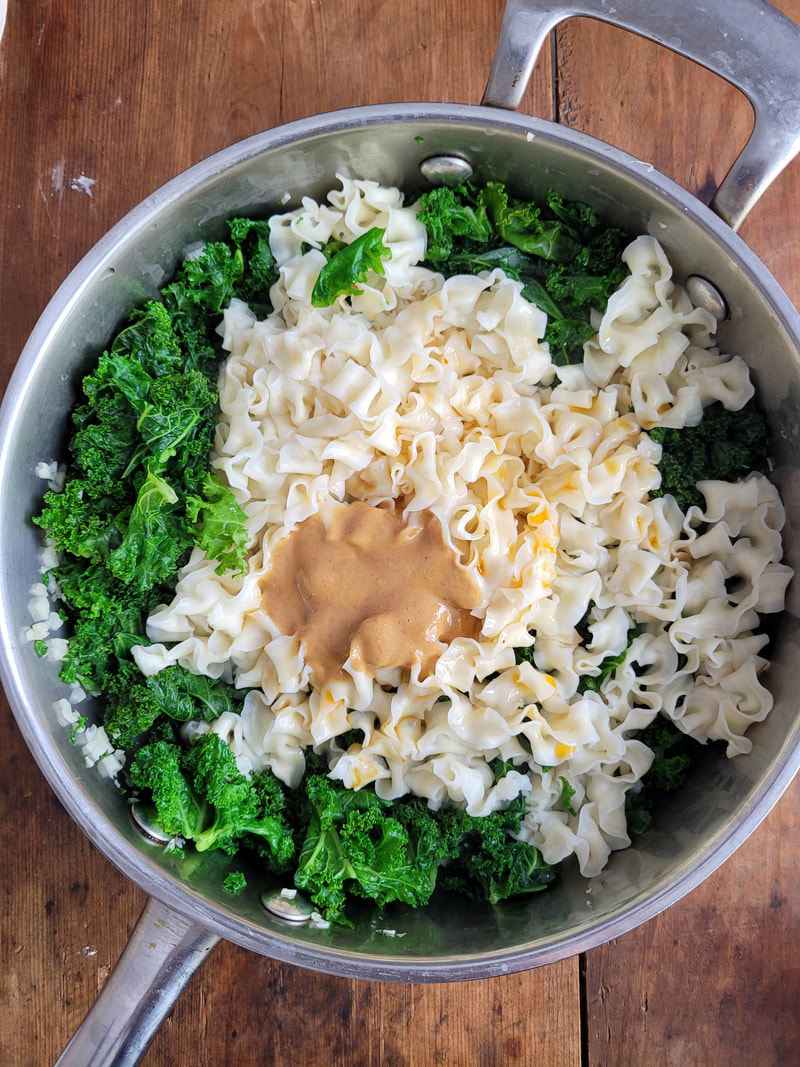
4. Dress Noodles & kale with peanut butter and flavoured oils.
Use tongs to transfer them to the pan with your kale. Add a couple small ladle fulls of noodle cooking water. Add peanut butter (Make sure the peanut butter is natural, and drizzly. Too stiff you will never get it mixed in. Then add a small drizzle of sesame oil, and several swirls of the Szechuan Oil. Mix to combine. The noodle water you add helps create a sauce. They would be too dry otherwise. Taste a noodle. They should coat your lips with delicious oils/nut butter. If you can't taste the Szechuan oil, add a bit more. 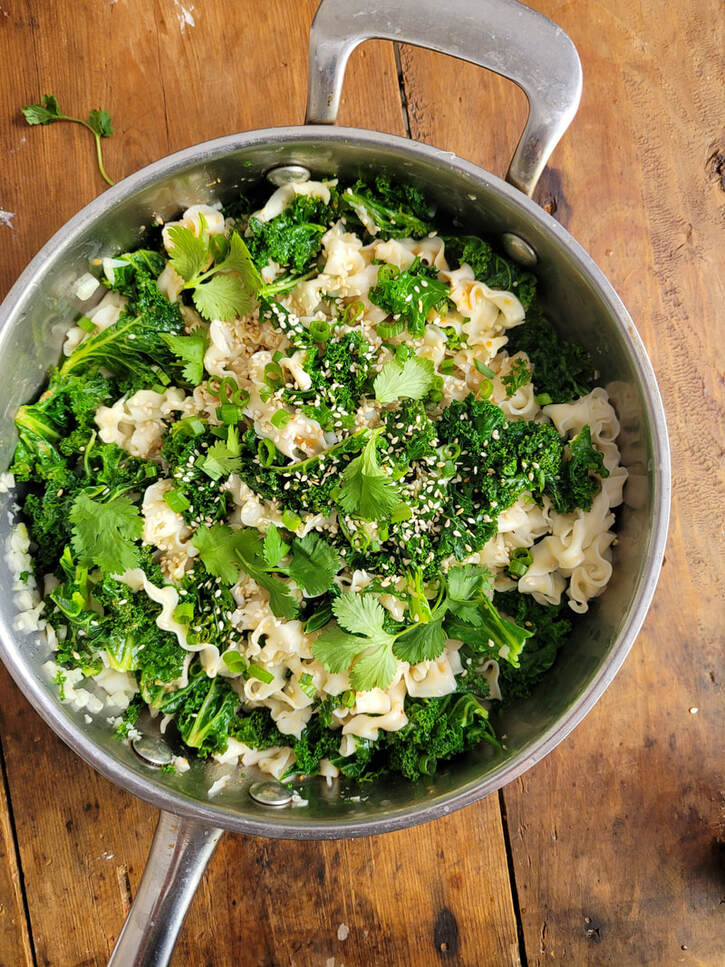
5. Garnish with toasted sesame seeds, chopped green onion & fresh cilantro. Enjoy!

Hey friends! This page may contain affiliate links. If a purchase is made through one of the links, I may make a small commission at no extra cost to you.
Recipe Difficulty: Easy
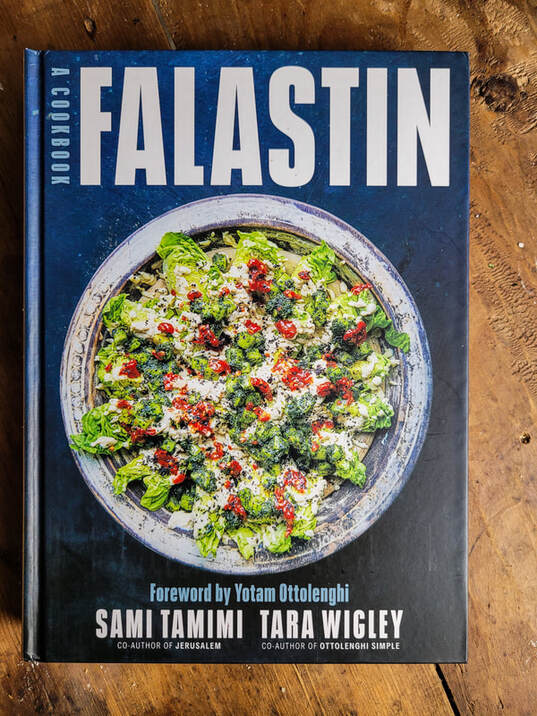
I am cooking my way through some of the recipes in the cookbook "Falastin" by Sami Tamimi & Tara Wigley. Some dishes are naturally vegan, others I will try to veganize. The more I flip through the pages and read the stories, the more I am enchanted with the rich history and culture. As I write this we have been watching the genocide of Palestinians in Gaza for over 80 days. It's important to not only share the horror, blood & dust, but to share the essence of what we must never give up fighting for. Palestinian culture. Palestinian joy. Palestinian freedom and self actualization. We give up a piece of our humanity everyday peoples basic human rights are being denied. Freedom for Palestine is also our freedom.
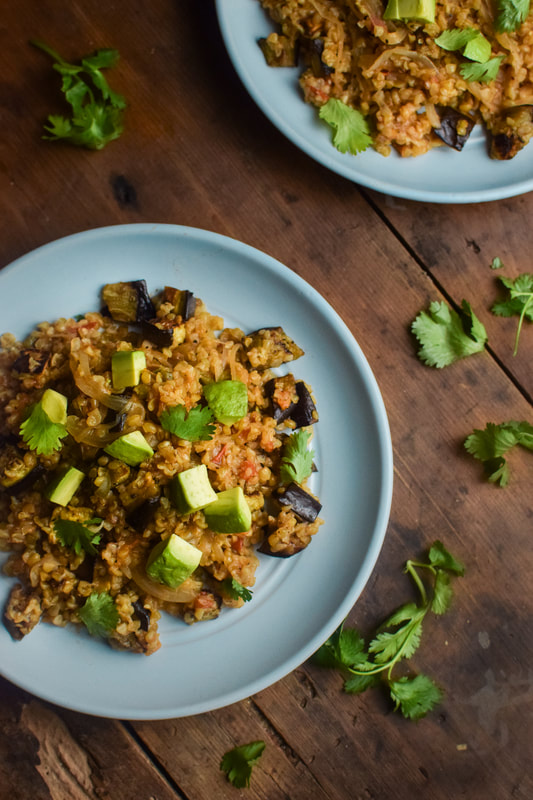
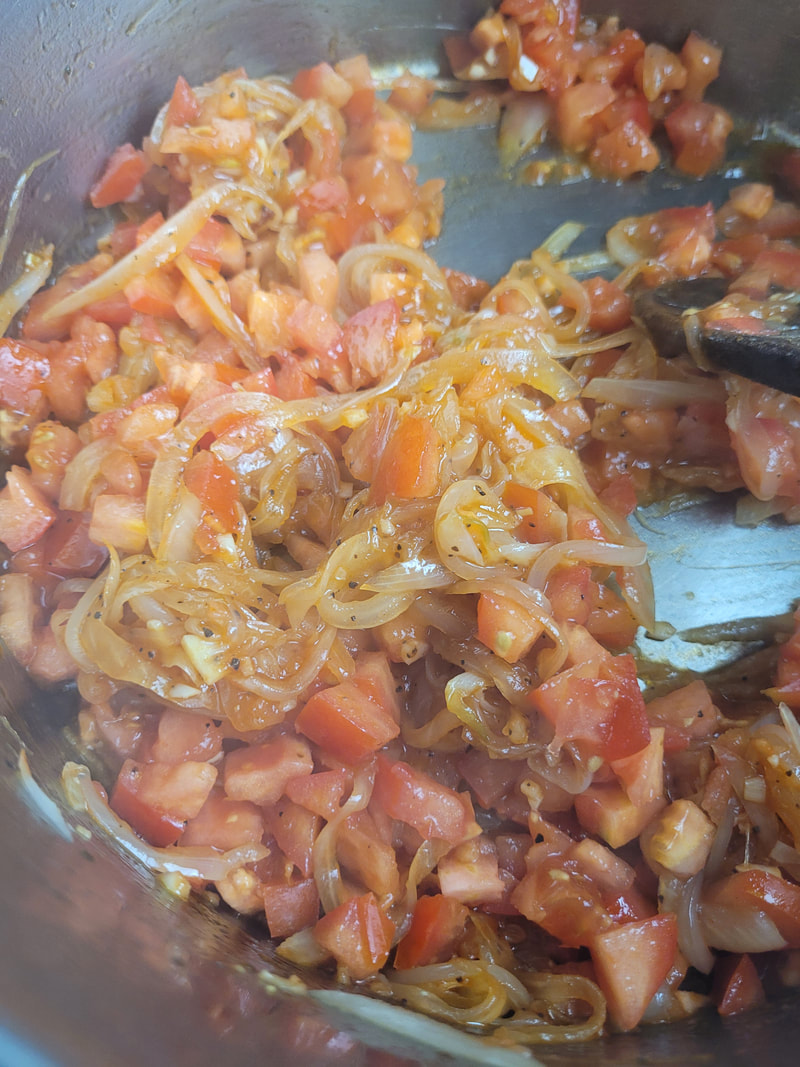
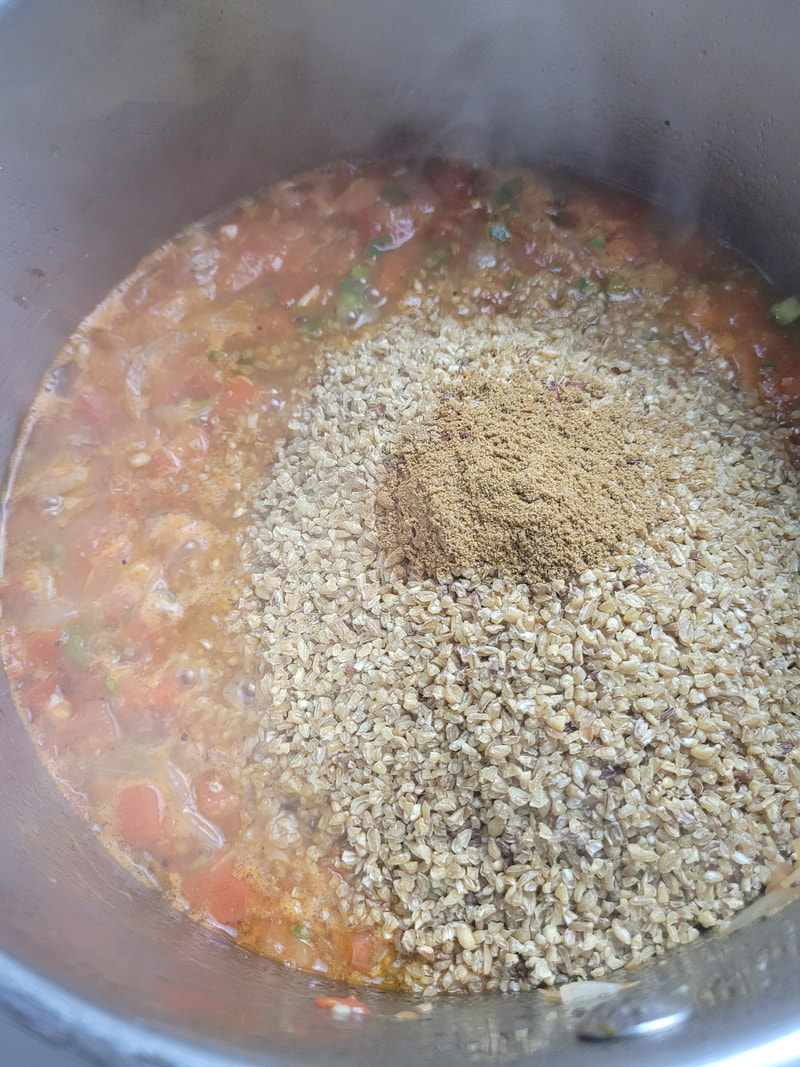
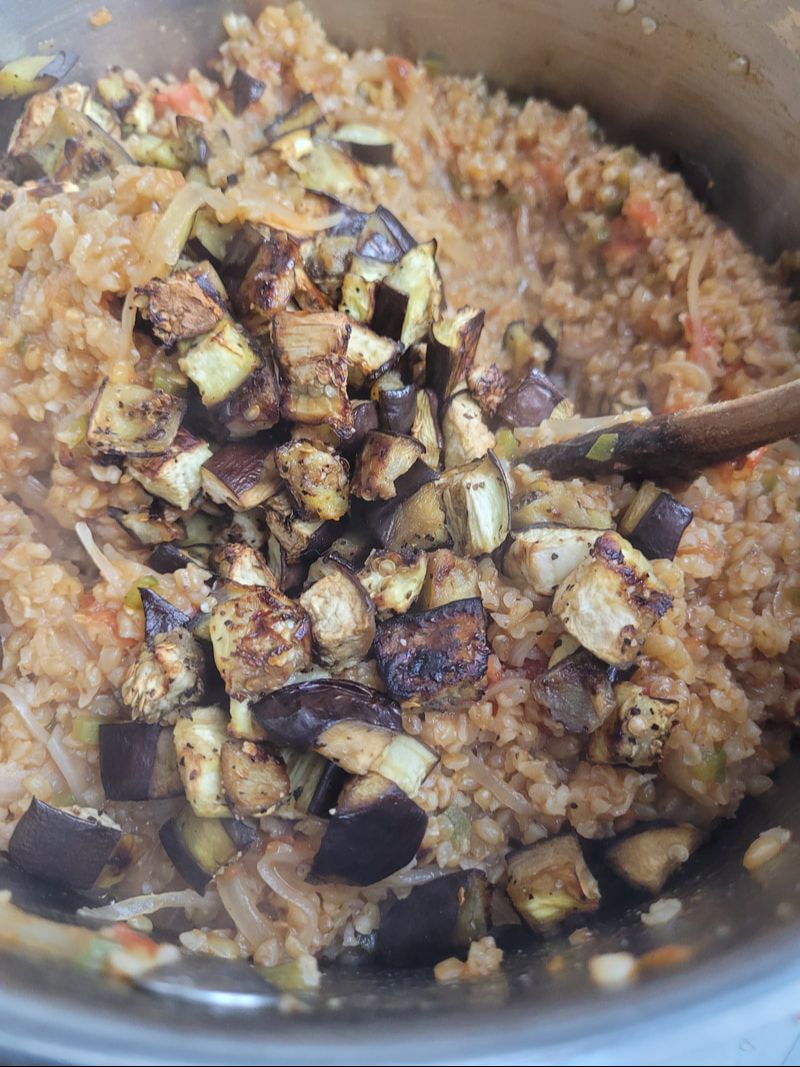
This Bulgur Pilaf is a really simple and humble dish. It almost gives me "healthier risotto" vibes. This is the type of food I gravitate towards. Middle Eastern food is naturally or relatively dairy free from what I can gather. The cuisine centers lots of whole grains, nuts, seeds and vegetables. Meat and fish are a central part of the diet also, but many recipes are naturally vegan. In this recipe cubes of eggplant are roasted in the oven, and stirred into a pilaf of bulgur, tomato, onion, garlic & spices. The recipe suggested cubes of avocado or feta to garnish, I went with some avocado. The avocado tasted great and I liked the little pop of colour, too. 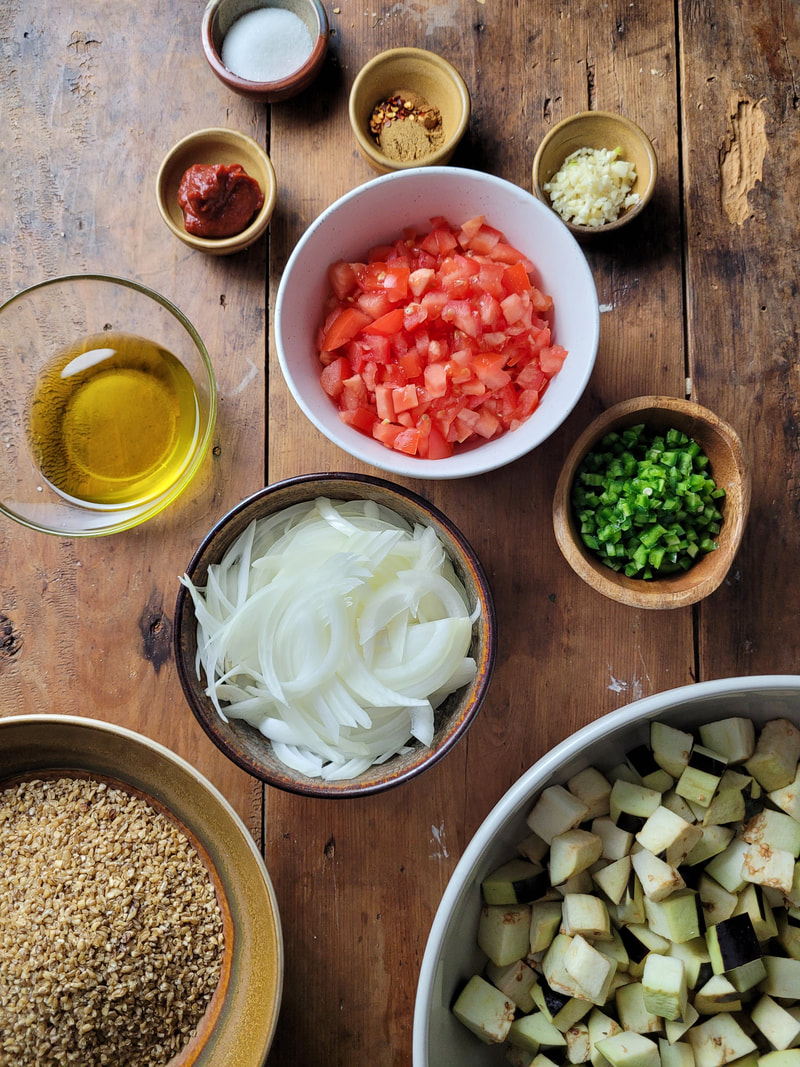
Recipe Notes
The original recipe calls for 2 green chiles. I used one large jalapeno, deseeded. The recipe also suggests if you don't want to use eggplant, substitute with zucchini instead. The cooking time would change but roasted zucchini folded in at the end would be delicious. The other thing that didn't work for me in the original recipe was the amount of boiling water called for. (1 2/3 cups to cook the bulgur. ) I added the amount of water the recipe suggested, but then had to add a bit more. It's no big deal to do that by adding a splash at a time, leaving the bulgur on low until it softens to the right texture. I'm guessing it just depends on the brand of bulgur you are using, so I am suggesting just looking at the package. The original recipe called for 2 medium eggplants. or 5 cups. I didn't really know what a medium eggplant was, so I grabbed 2 from the store. I guess mine were large because one eggplant was enough!
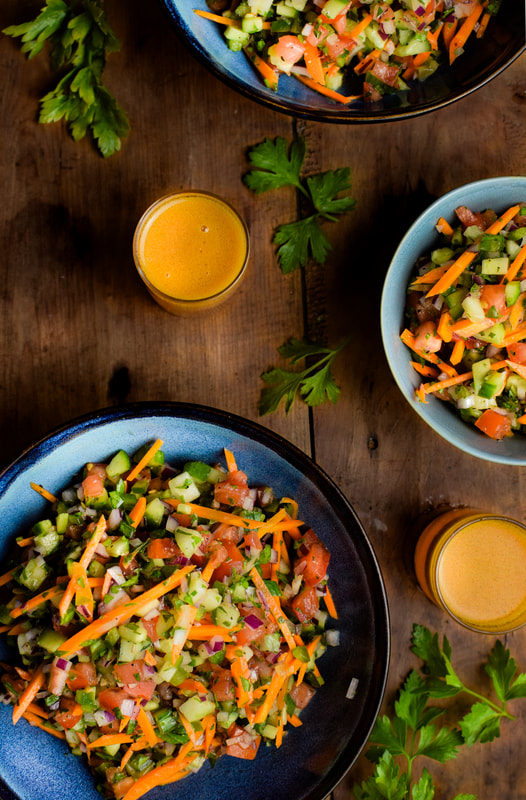

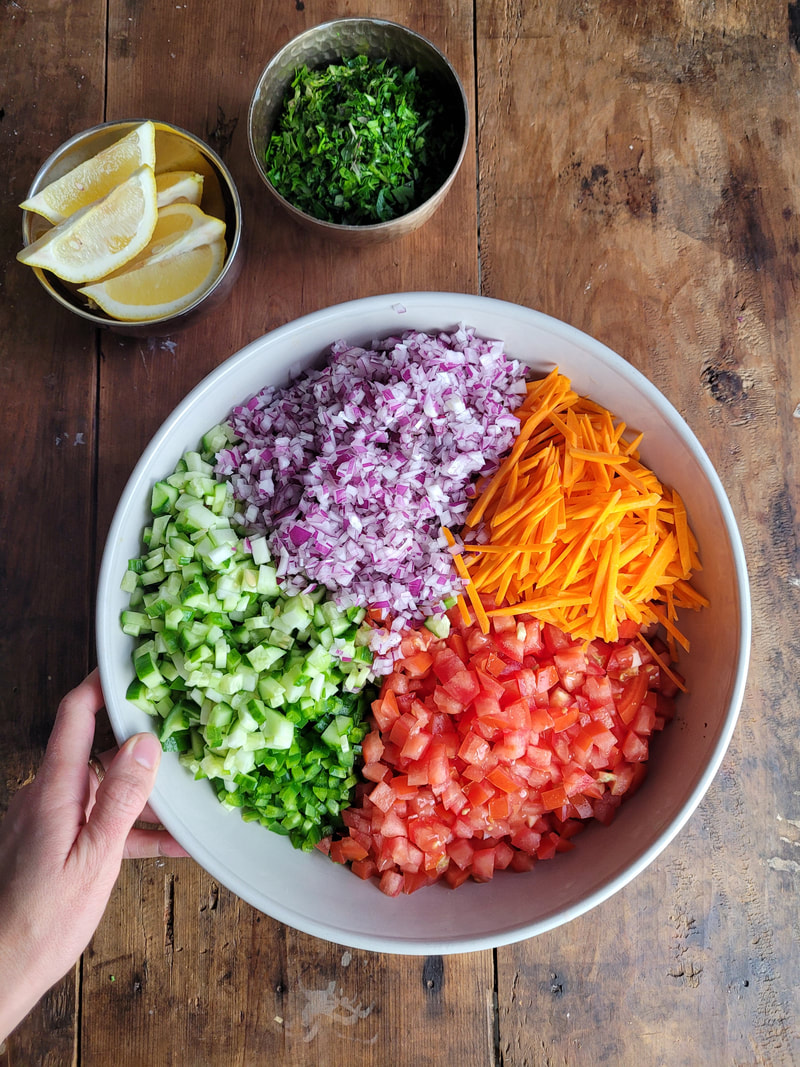
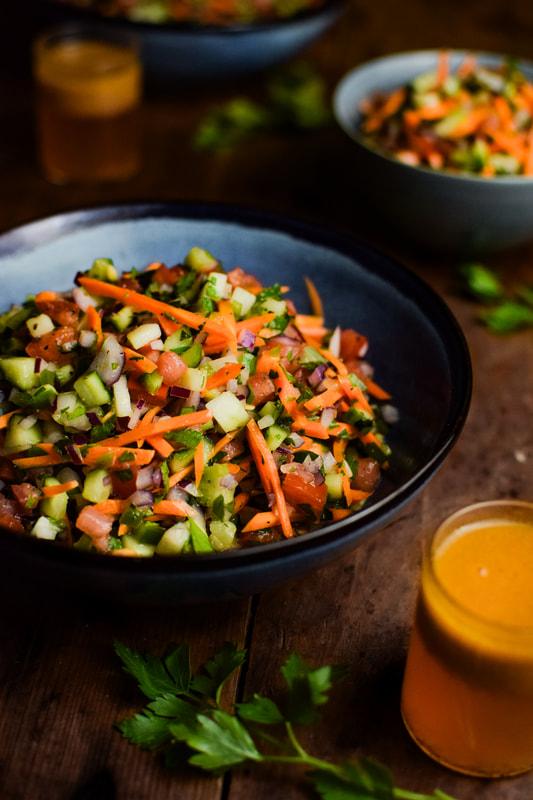
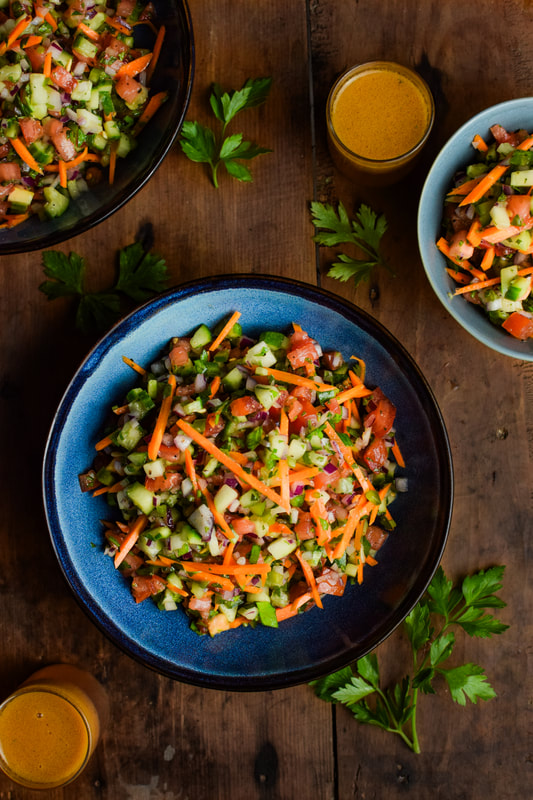
Salata Baladi Recipe Notes
Salata Baladi is an Egyptian Tomato and Cucumber Salad with Fresh Herbs, Onion, Olive Oil and Lemon. I read that it is traditionally served at kebab restaurants. I often make it as a side dish for my Egyptian Fava Bean Stew, but it would be delicious on the table amongst any middle eastern inspired fare. When I was doing a bit of quick research for this salad, I noticed some recipes approach it differently. The most complicated one involved adding grated tomatoes along with the chopped tomatoes, then adding cubes of ice to get it super cold, and there were other steps... The concept of the grated tomato, is to create more "juice" in this salad. These juices that inevitably pool together at the bottom of the bowl (from the tomato and dressing), is actually a coveted component of this dish. It's called the "whiskey". (not THAT kind of whiskey). The idea is, you eat the salad, and drink the delicious marinade along side. So, with that being said, from experience I know without adding extra grated tomato, a chopped salad like this will release lots of juices by itself. I saw some recipes that were the same as I am sharing, so I can't speak to what is most authentic. What I can say is, it's a really delicious simple accompaniment to the fava bean stew, and obviously would be great alongside other dishes from the Middle East. Variations Also it should be noted the ingredients listed below aren't the only ones I saw in other recipes. Some use different peppers like jalapeno or chili peppers for heat, some add bell peppers along with cucumber & tomato and not all of recipes included carrot. Sometimes I use cayenne pepper, but the last time I had Jalapeno Peppers on hand so I used those. 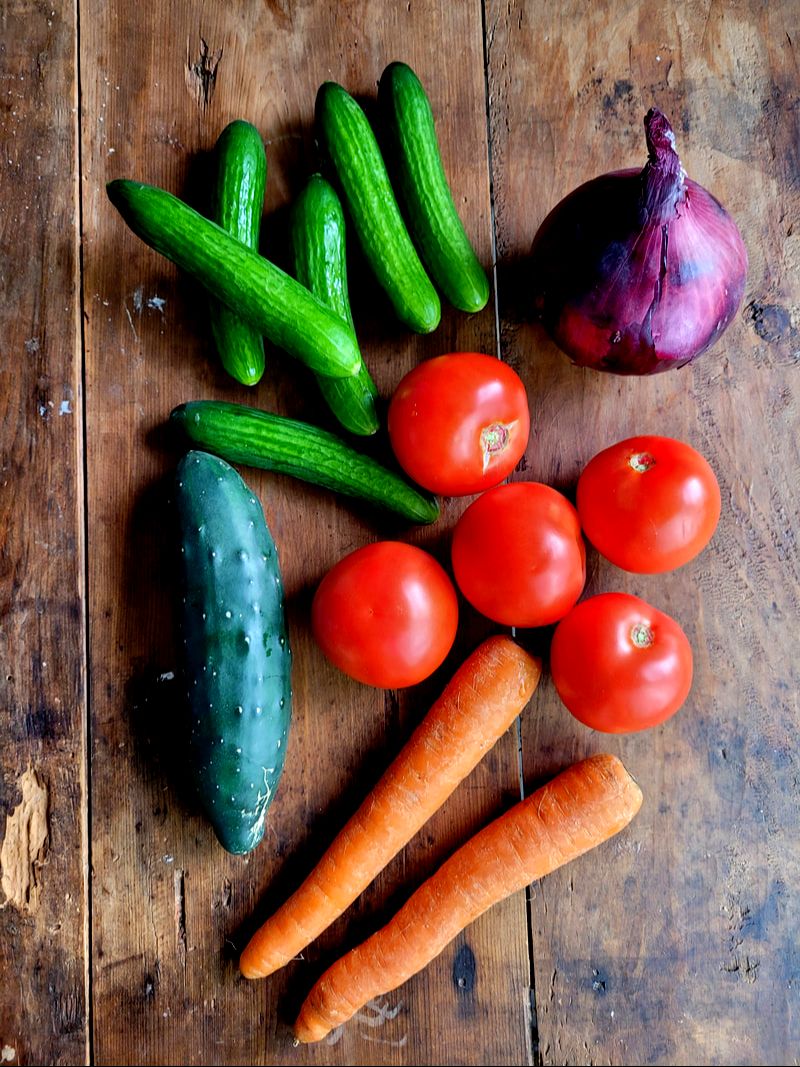

Recipe Difficulty: Easy
Keywords: Dairy Free, Naan, Vegan 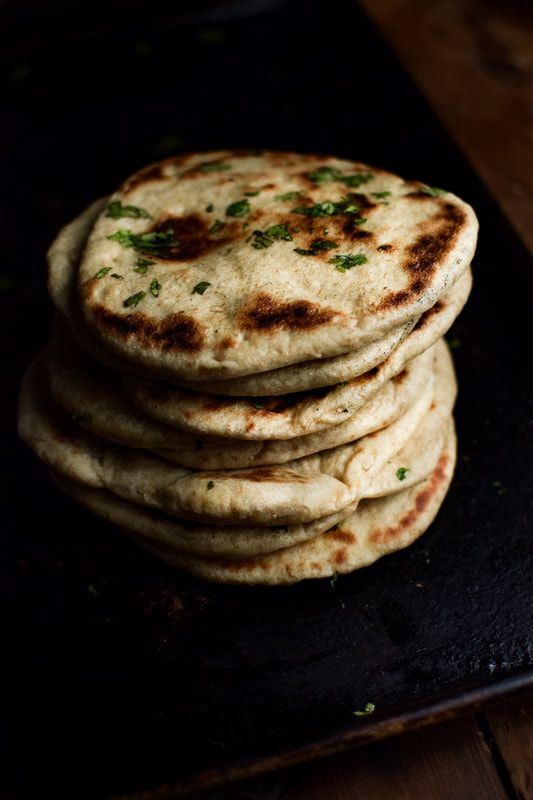
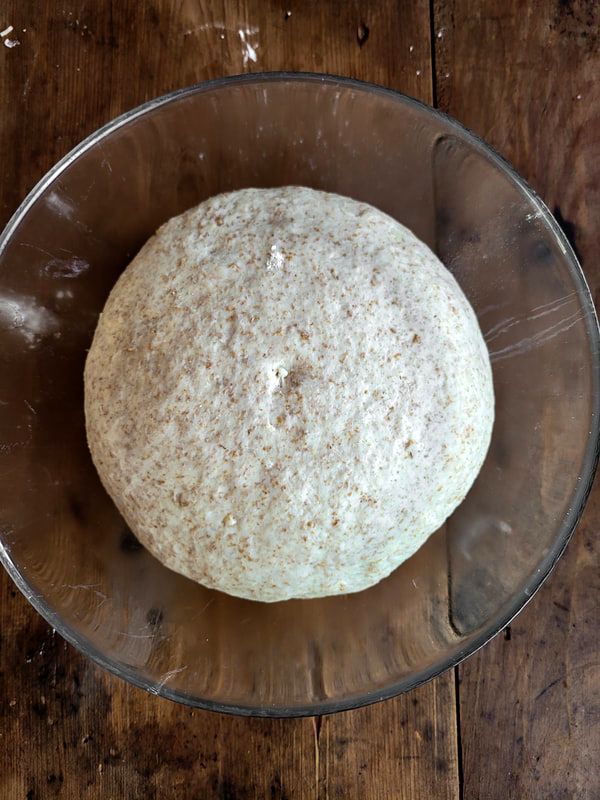
Naan Bread Recipe Notes
Making your own Naan bread is easy, and the results are satisfying AF. I don't know about you, but when curry is on the menu, having flatbread along side is one of my favourite parts of the meal. I'll either make this naan or my recipe for chapati . Flour I like to use whole wheat flour in my naan bread, but you could use 100% AP flour if you prefer. Yogurt For the yogurt, my go to is Silk brand Almond yogurt. I haven't tried the recipe with other brands of vegan yogurt, but I'd try to find something with a good amount of fat, make sure it is plain, not vanilla, and my personal preference is one that doesn't taste like coconut. (I know curry and coconut work together, but I don't really want my naan to taste like coconut. To be fair I haven't tried it, but I like it this way so that's what I'm going to keep doing.) I think vegan sour cream would most likely work just fine in this context too. Garlic, Vegan Butter & Cilantro I like chopping a couple cloves of garlic and mixing it into my dough, but that is completely optional. Brushing the tops of the cooked naan with butter then a sprinkle of cilantro is also optional, and honestly I add this step for the visual as much as anything. (By the time my curry is piled on top I doubt a small sprinkle of cilantro is going to add much, plus I add cilantro to garnish my curry most of the time too, but it looks nice!) Leftover Naan/Reheating/Freezing I keep my leftover naan bread wrapped up and in the fridge. To reheat I just preheat my cast iron pan and warm each side. You can freeze naan for up to 3 months. I pop cooled naan into a freezer bag. Then when I want one, I thaw and reheat the same way. Cooking Naan I use a cast iron skillet on my stove top. You could also preheat a cast iron skillet or pizza stone in a hot oven and cook it that way. 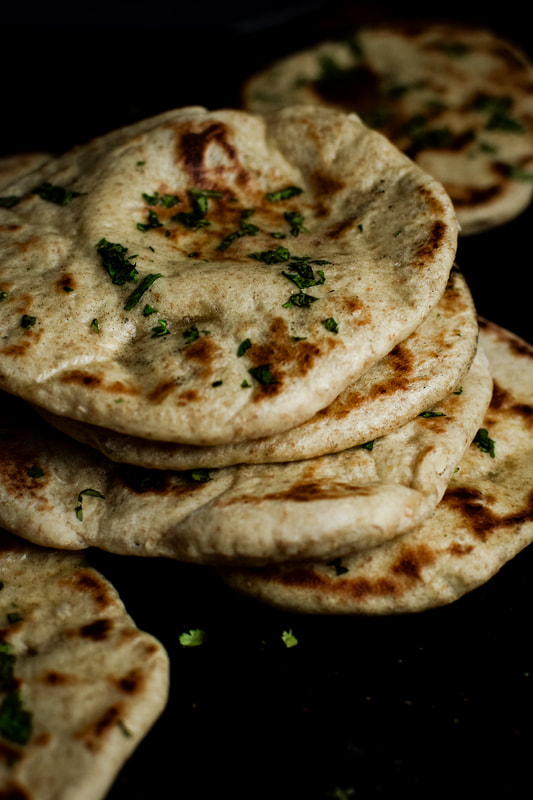

About Naan
The word "naan" is derived from the Persian word "nan," which means bread. This reflects the historical influence of Persian cuisine on the Indian subcontinent, as there has been cultural and culinary exchange between the two regions over the centuries. Traditional naan is typically made from a simple dough of wheat flour, water, and yogurt, which is then leavened with yeast or a natural starter culture and baked in a tandoor oven, which is a clay oven with high temperatures. This method gives naan its distinctive soft, chewy texture and slightly charred exterior. For home cooks, using preheated cast iron pan is a great alternative. 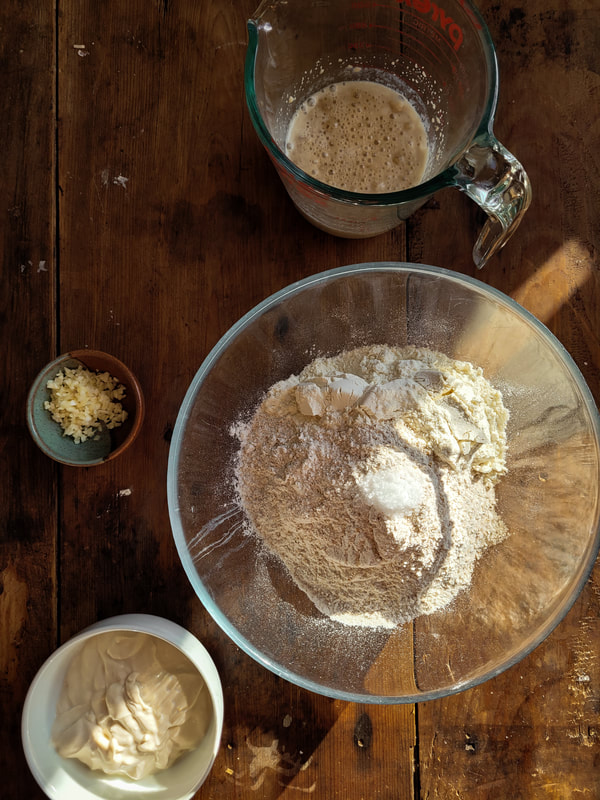
Step 1, get your ingredients organized. In the largest bowl, flour with salt on top. Yeast is mixed with warm water and a bit of sugar. Choose a high fat vegan yogurt. I use Silk Almond Yogurt. Chopped garlic is optional.
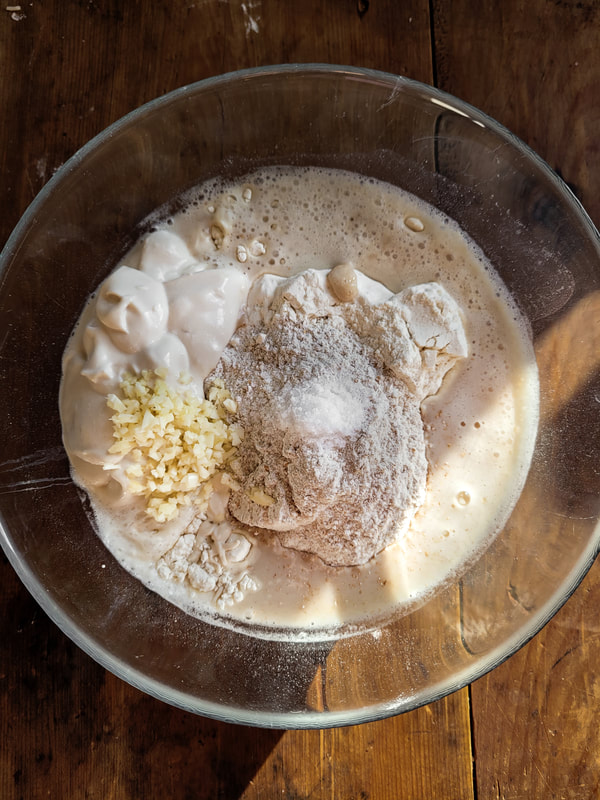
Step 2. Add everything to the bowl with your flour. I always avoid pouring my yeast & water mixture onto the salt that I add to the top of the flour mound.

Step 3. Using a spoon to stir, start to combine everything to form your dough. You might have to add a few splashes of warm water to get all of the flour incorporated. I always prefer to start with less water, then just add a tiny amount at a time if needed.
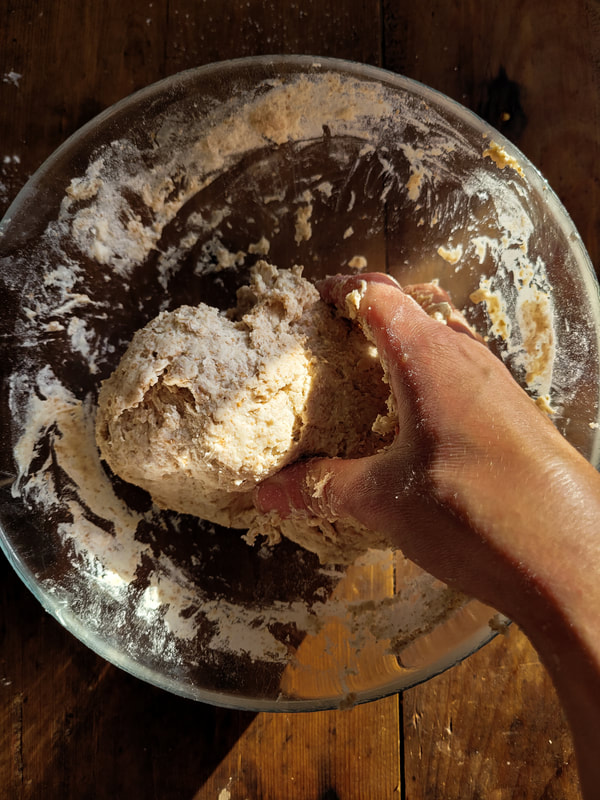

Step 4. I switch from spoon to using my hands to finish gathering everything together to form a ball of dough. I transfer it to my counter and knead if for a few minutes. This is the point where you might need some practice if you aren't used to kneading a simple bread dough. You can totally add flour/splashes of water if needed. If it is too dry, it won't fold over itself as you knead it. If it's too wet it's really difficult to knead without sticking all over your hands. Ideally the dough is a bit tacky, but not sticky or dry.
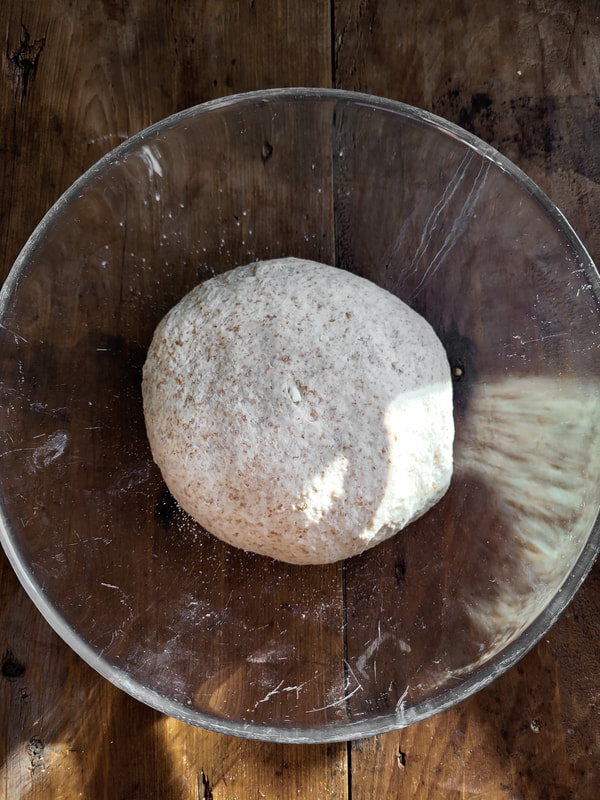
Step 5: After kneading the dough, shape into a ball, place back into the (clean) bowl and cover with a damp tea towel to rise. About one hour, or until doubled.
Step 6: Once doubled, punch down the dough. It might take more than one hour to rise depending on the temperature of your room/space. Keeping it somewhere warm helps.

Step 7: After you punch down dough, divide it into 8 pieces. form them into little circular shapes as best you can.
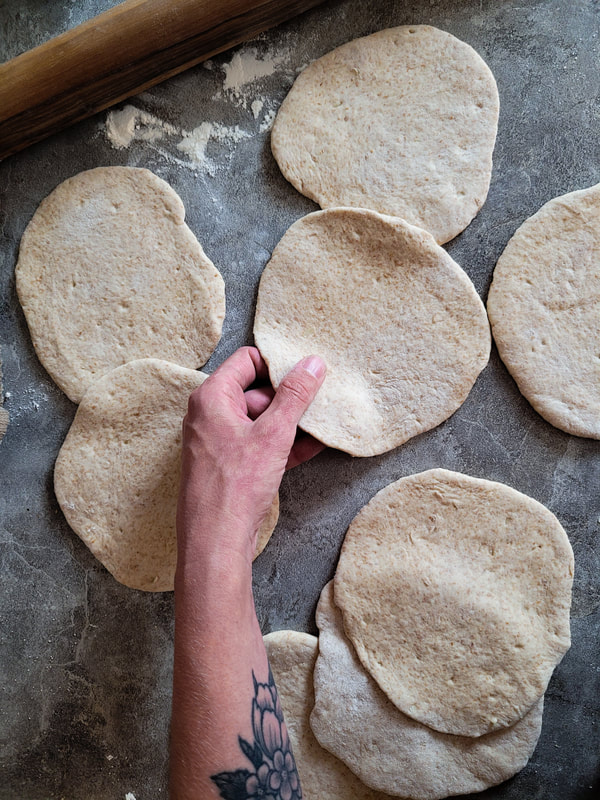

Step 8: Now roll each dough ball into an approximate 6 inch circle. If it is hard to roll, you can let the dough rest just for a few minutes. The dough will relax and it is easier to roll out. Dust with flour as necessary during this phase. I find it easiest to flatten it out with my hands into a disc shape first. Then when you are rolling, keep turning the naan like hands moving on a clock. Roll, turn, roll, turn etc....this will help you get an even circle shape. (mine are never perfect, and they don't need to be!)
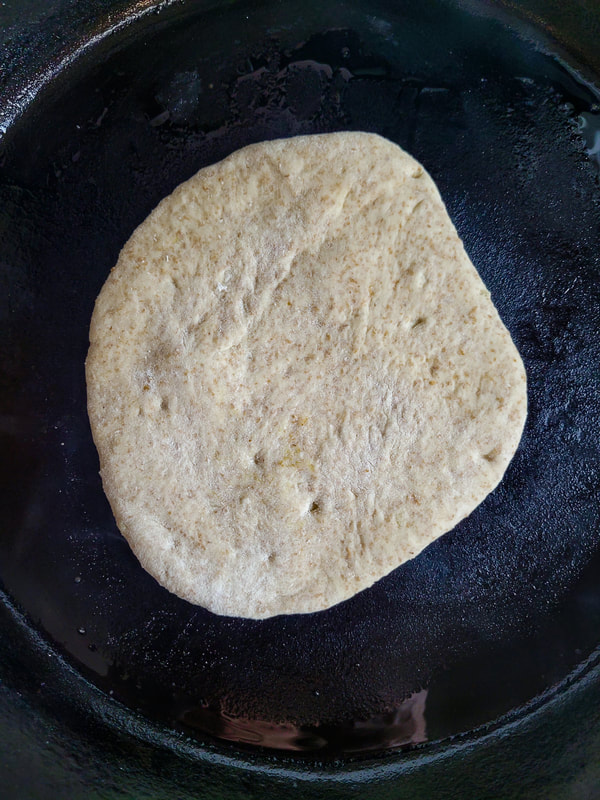
Step 9. Heat a cast iron pan over medium heat (or just a bit higher than that). Place a piece of naan in the preheated pan. It might start to bubble as it cooks. 2-3 minutes should do it. Then flip and continue cooking the other side. Watch out for steam escaping from the bubbles. Steam burns are the worst!!!
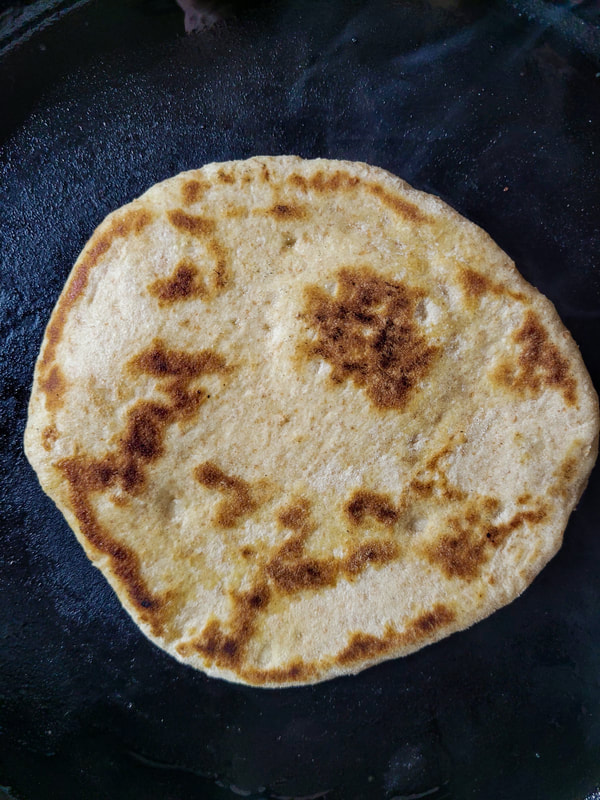
Step 10. Finish cooking on the second side for 2-3 more minutes. Repeat with your remaining naan. I move the cooked ones over to a sheet pan.
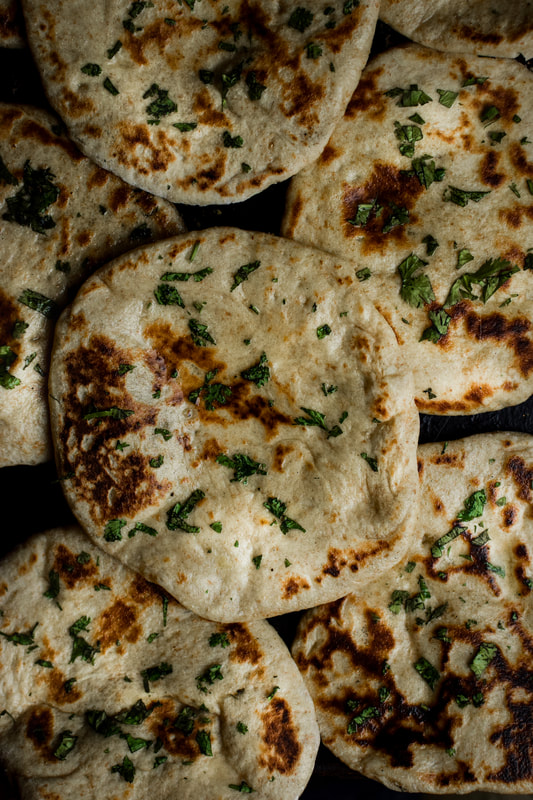
Step 11. Brush naan with melted butter and a sprinkle of chopped cilantro. (optional)
Hey friends, this post may contain affiliate links. If you make a purchase through one of these links, I may earn a small commission at no extra cost to you.

Recipe Notes
Piling a bunch of delicious healthy things onto toasted sourdough bread is one of my favourite meals when I want something satisfying yet super quick for dinner. This is a loose recipe in the sense that you need to taste it to get the balance right. It's going to require a lot more olive oil than you might intuitively put. The olive oil is basically the sauce. I add a dash of balsamic vinegar and a bit of maple syrup at the end for acid and a bit of sweetness. When you take a bite of this toast, everything on top should almost taste marinated. Like it was packed in oil, and you spooned it out of a jar. Other Variations This is only one version of the toast I have made, it might be my favourite to date. Once you get the hang of dressing things with olive oil and vinegar with lots of garlic, salt and pepper....you will undoubtedly start throwing together all sorts of combinations. I don't always add beans, sometimes it's just fresh chopped tomato and kale, with maybe some vegan feta tucked in. (pictured below) Of course you could use spinach, chard, any beans that you like. Leeks make it special. There's something addictively good about a toast that includes them in the mix. They get buttery soft and have a sweet onion flavour that's to die for. If you want to add a splash of white wine while the leeks are cooking, it's a nice option too. I don't always have wine on hand, but it's definitely good and the alcohol burns off in case that's a concern. If you don't like sundried tomatoes, try adding olives! A smear of olive paste on the toast or chopped pieces. I could also see using pesto for a flavour punch. Options are endless. Bread For this recipe, I used Ace Bakery sliced sourdough. It comes in a big loaf, pre sliced at the Atlantic Superstore. The slices are large and oblong. 4 slices were enough for the amount of filling. Of course, any good quality store bought sourdough would be great! I'd probably slice the slices just a BIT thicker than theirs, but alas, it's often the only sourdough I can find near me. 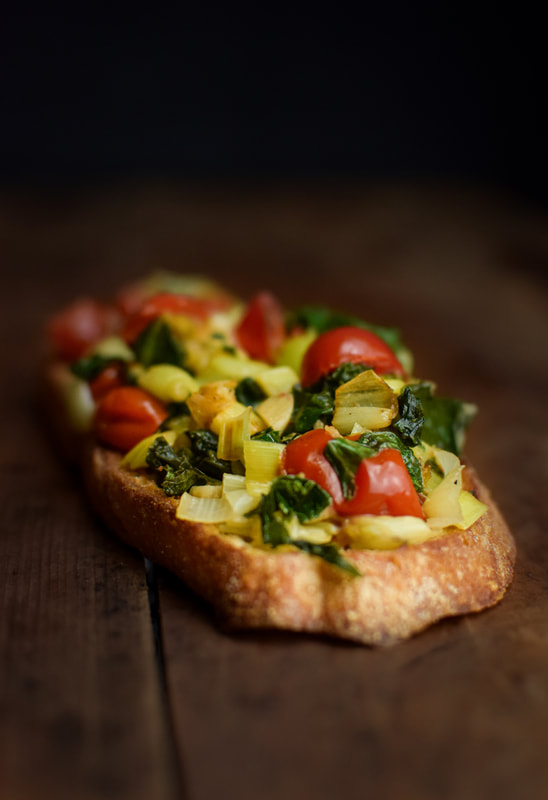

Recipe Difficulty: Easy
Recipe Keywords: Minestrone, Vegan, Pasta, Vegetable, Soup, Healthy 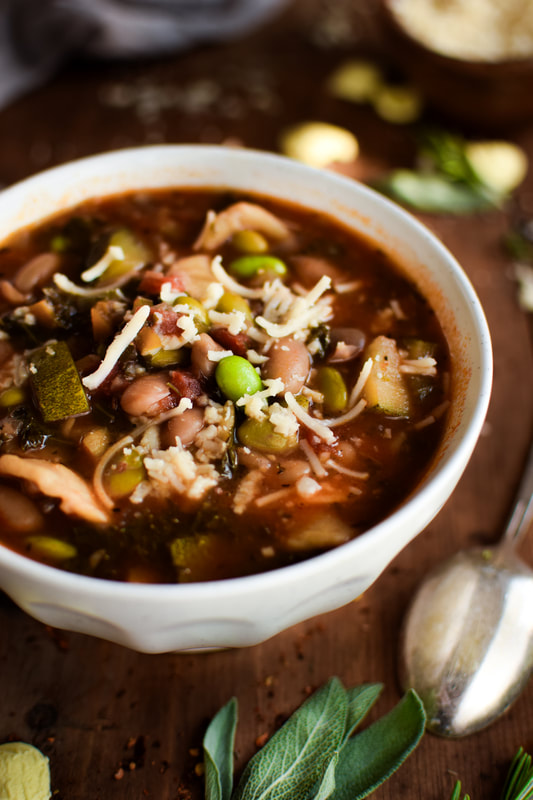
My Minestrone Recipe Notes
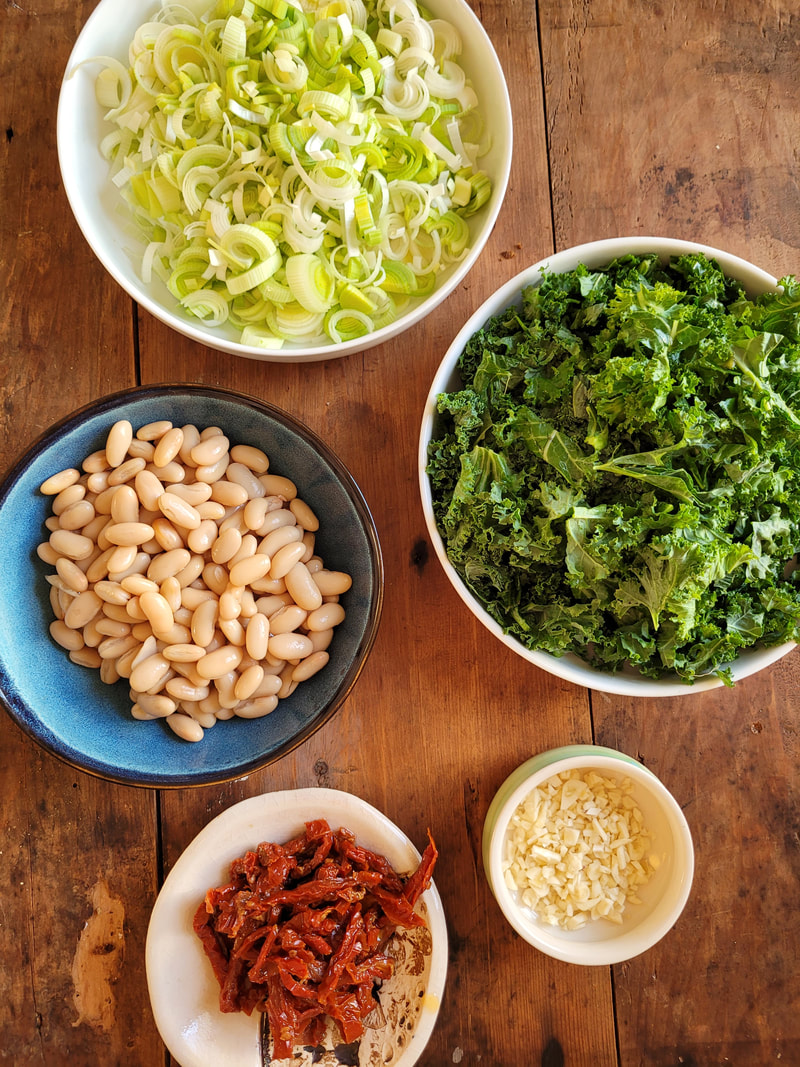
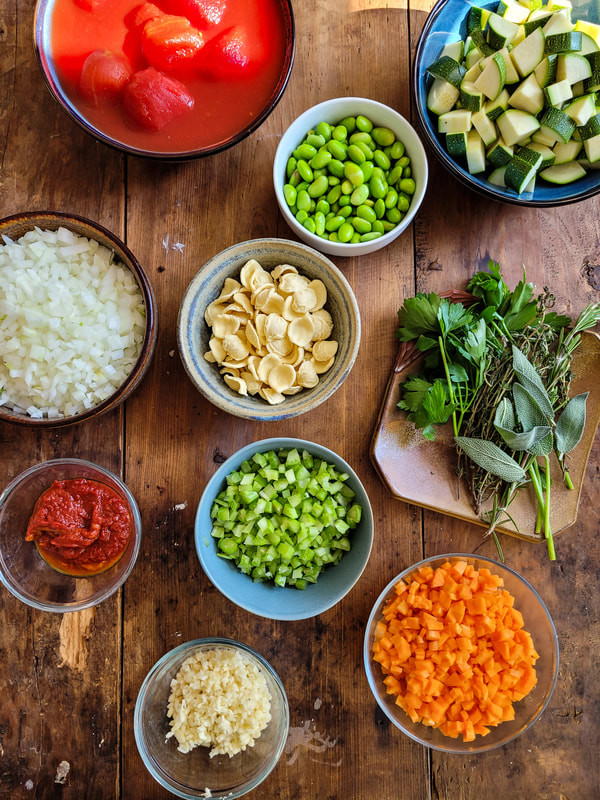
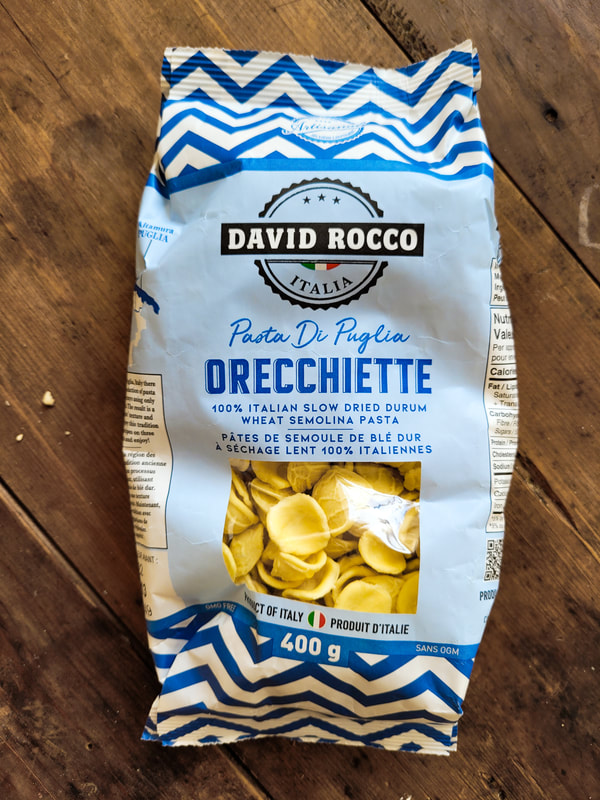
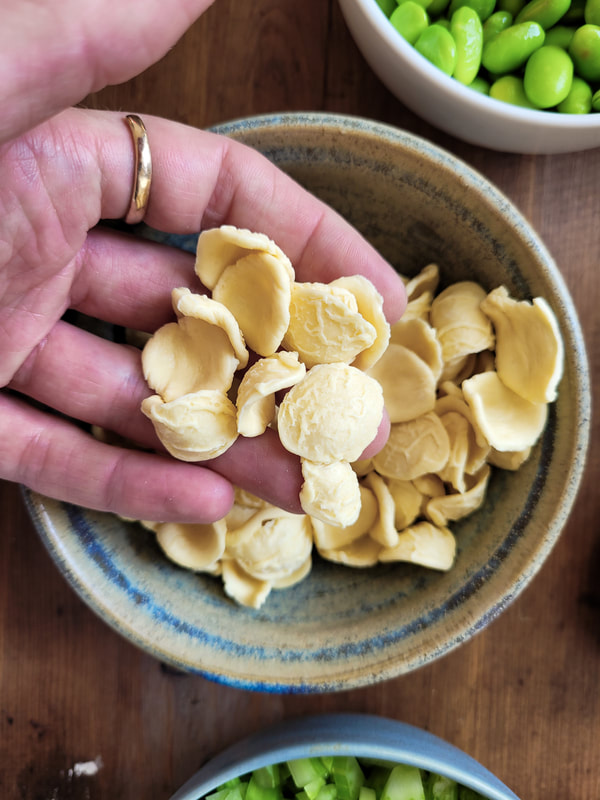
I am in love with this soup. It's simple, flavourful, hearty, satisfying, delicious...you get the idea. There are a lot of variations of minestrone out there, and honestly I can't remember ever having minestrone soup before attempting my own. Vegetables seem to vary between a lot of recipes, so I just went with what I like/was in the mood for. Perhaps there is a way of preparing this soup that is most authentic, and if I have deviated from that, that's ok...because this soup inspired by minestrone, and it is now one of my favourites on my blog. Also, that's not to say that I won't mix up the veg sometime down the road. I'm a big fan of switching things up in all sorts of dishes based on what I have on hand or what's available at the market. Don't let a slightly longer ingredient list deter you. The prep is simple. Opening a bag of frozen edamame & a can of white beans is quick, shredding kale takes two seconds, opening a bag of pasta and canned tomato, easy.....and most of the cooking time is letting it simmer gently on the stove while you can be doing something else. It's delicious and I hope you try it and love it as much as I do.
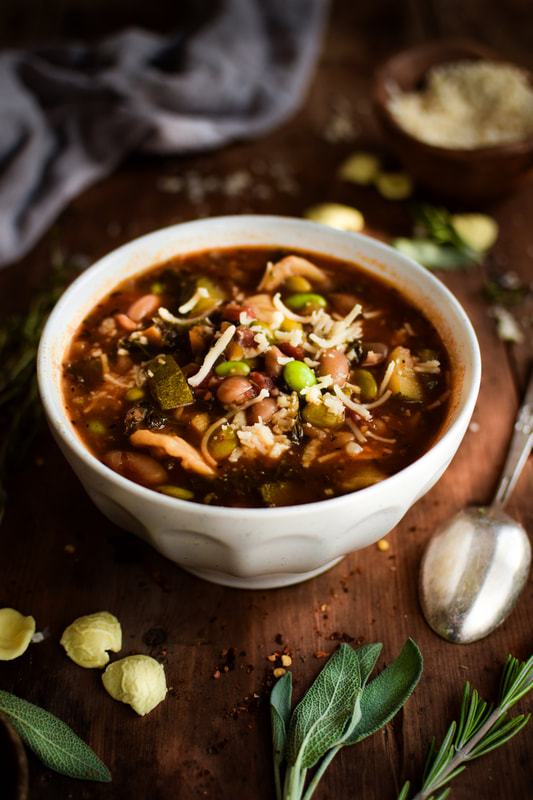
What's in my soup?

HOW TO MAKE VEG STOCK/SAVE MONEY/REDUCE WASTE
I always make my own. I don't have a recipe per say, and I'm pretty sure in every soup recipe I talk about this. I have a bag in my freezer that I keep there at all times. When I'm cooking meals over a few weeks, I save scraps of onion, carrot, tomato, mushroom, celery, thyme, parsley, garlic...and just toss it into the bag in the freezer. This can include onion peels, green onions, tomatoes that are past ripe on your counter....I waste practically nothing in my kitchen.
When the bag is full, that is when I decide to make a veg stock. You can make it and freeze it for later or plan soup for your meal prep!

Recipe Difficulty: Easy
Recipe Keywords: Rocky Road, Baked Oatmeal, Breakfast Cookies, Vegan, Gluten Free, 
Healthy Breakfast Cookies Recipe Notes
I developed this recipe because I needed something I could quickly grab to fuel my work days. Breaks aren't really a thing in many restaurant kitchens where I have worked. When energy starts to dip, something to eat while standing in between prep jobs or during service is essential. I wanted to use healthy simple ingredients, and even though I'm fine with gluten, I know many people aren't so I wanted to keep them gluten free. They come together in 10 minutes in 1 bowl.
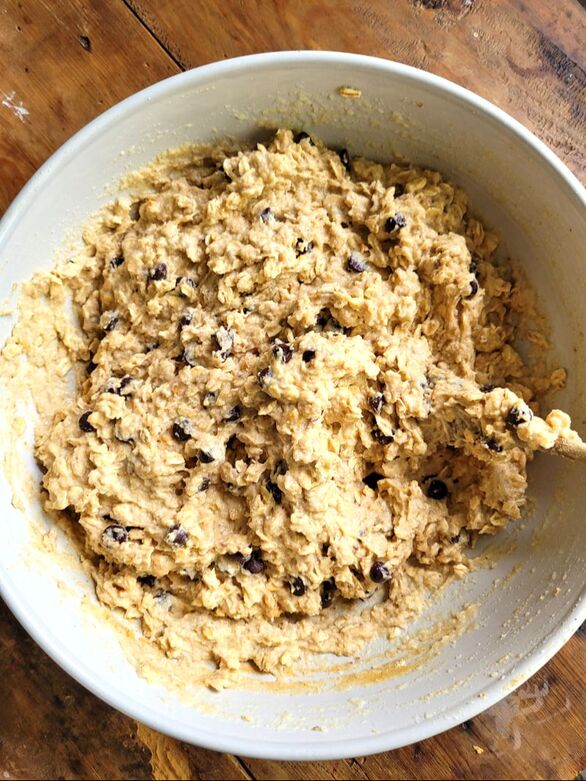
I used 70% organic chips in these, I am a huge chocolate lover so for me adding them was a no brainer. The marshmallows are definitely optional, I had an open bag and decided to garnish the tops with 3-4 mini vegan marshmallows per cookie. I don't tend to eat a lot of added sugar, but I'm not worried about a tiny portion size. The cookies themselves aren't very sweet, and I just thought they looked really cute with a few on top! 
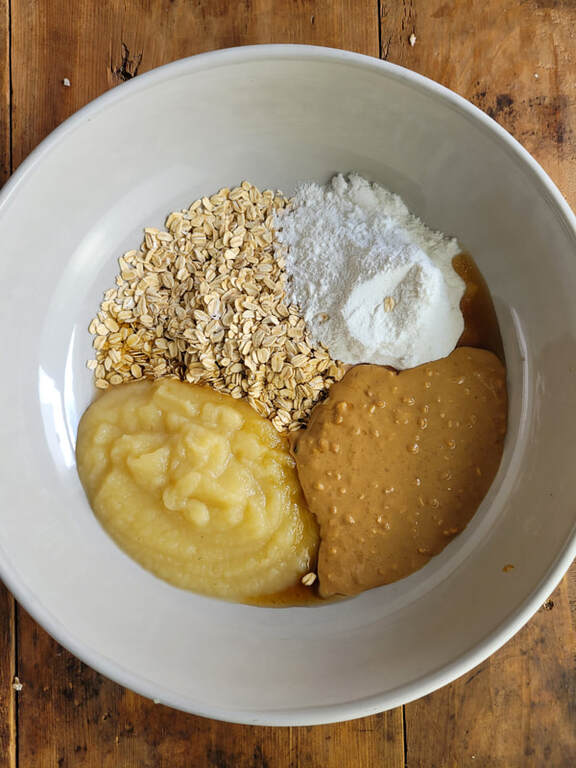
What is in these cookies? Answer: mostly simple whole food ingredients

Substitutions
I haven't tried other variations but this is what I would consider trying.

Storage


Hey friends! This page contains affiliate links. If you choose to purchase after clicking a link, I may receive a commission at no extra cost to you. Your support means a lot, and I thank you!
Recipe Difficulty: Easy
Recipe Keywords: Baked Pasta, Vegan Pasta, Cheesy, Roasted Vegetables, Summer Pasta 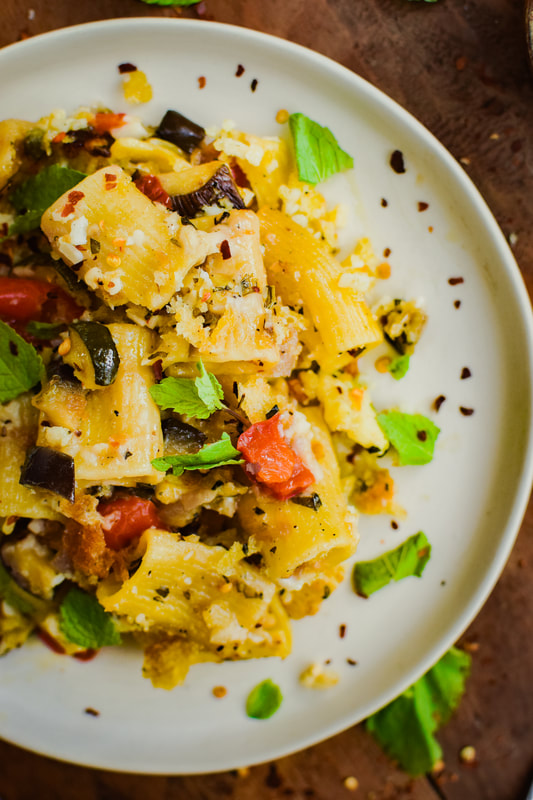
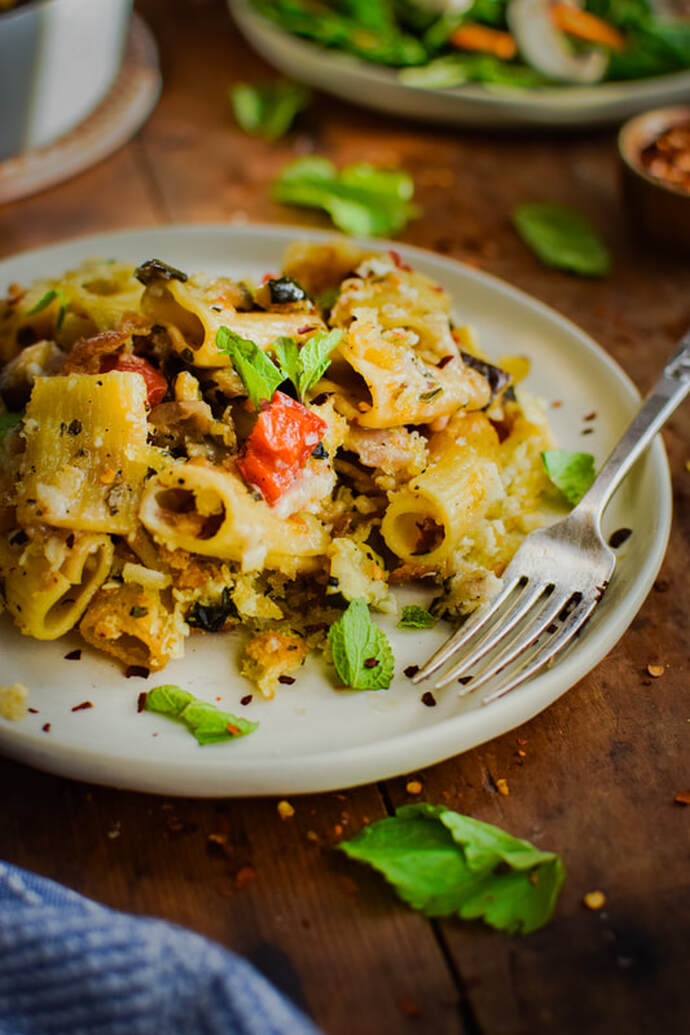
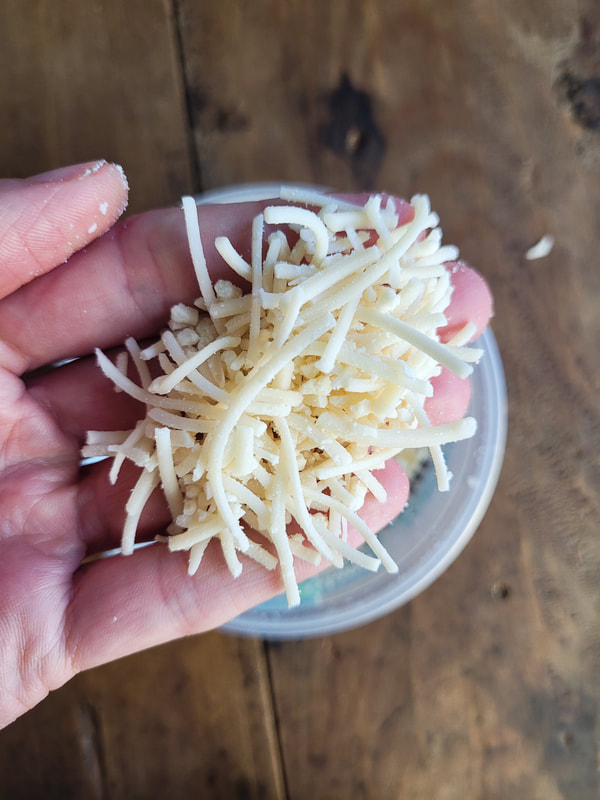
Cheesy Baked Rigatoni with Roasted Vegetables Recipe Notes
This baked pasta dish is adapted from rebar modern food cookbook, a fav book I have been using for over 20 years. The recipe is vegetarian and I wanted to veganize it. I have only made it the once, but it was really good so I am publishing it to serve as inspiration for anyone else, and so that when I go to make it the next time I have a reference point. Will I tweak some things? Yes. I'll describe all the details. It's a really simple thing to make, and you can read my notes and make adjustments if you wish. No matter what it is going to be good, I just know that over time I tweak things until they are perfect. (It was already pretty perfect...small details....I will update the post whenever I make it again to adjust anything I think is a worthy improvement)
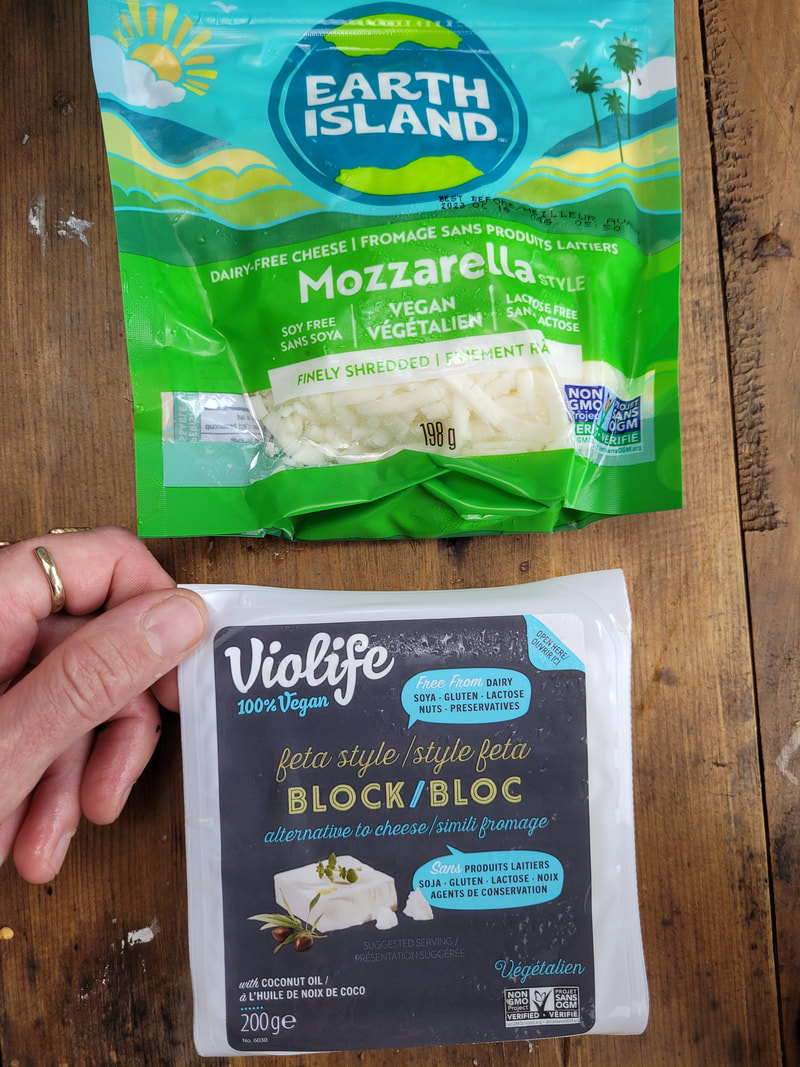
What is in this Cheesy Pasta Bake?
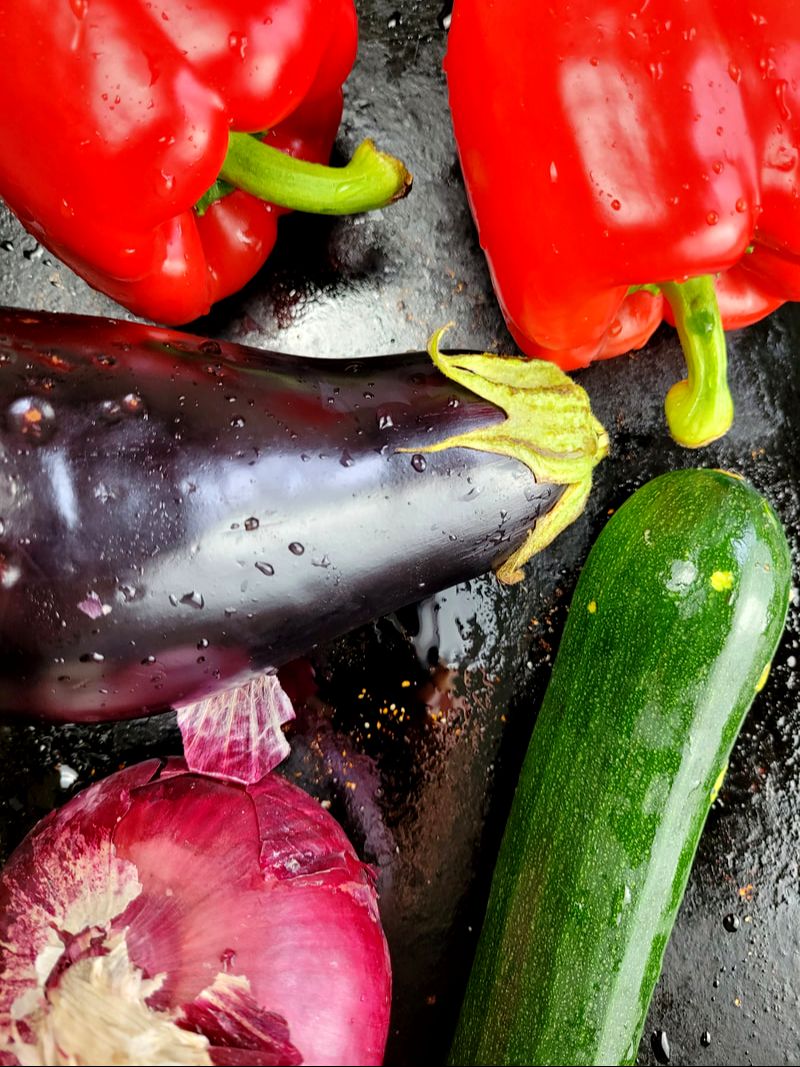
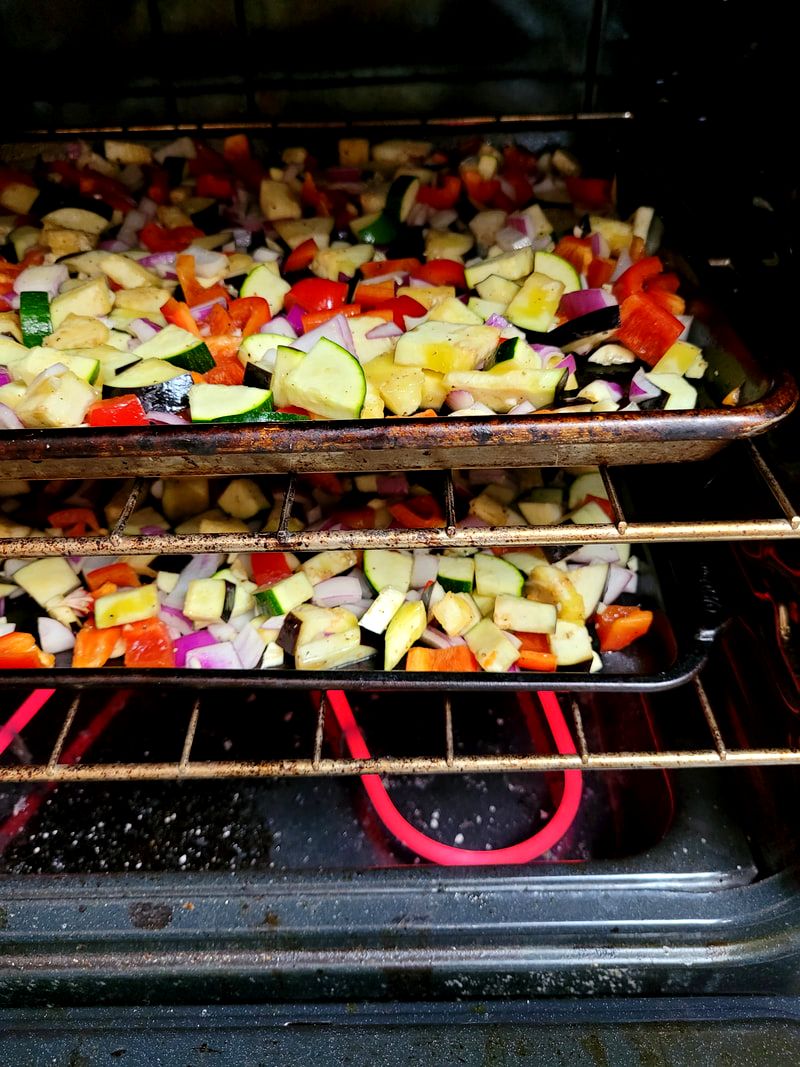
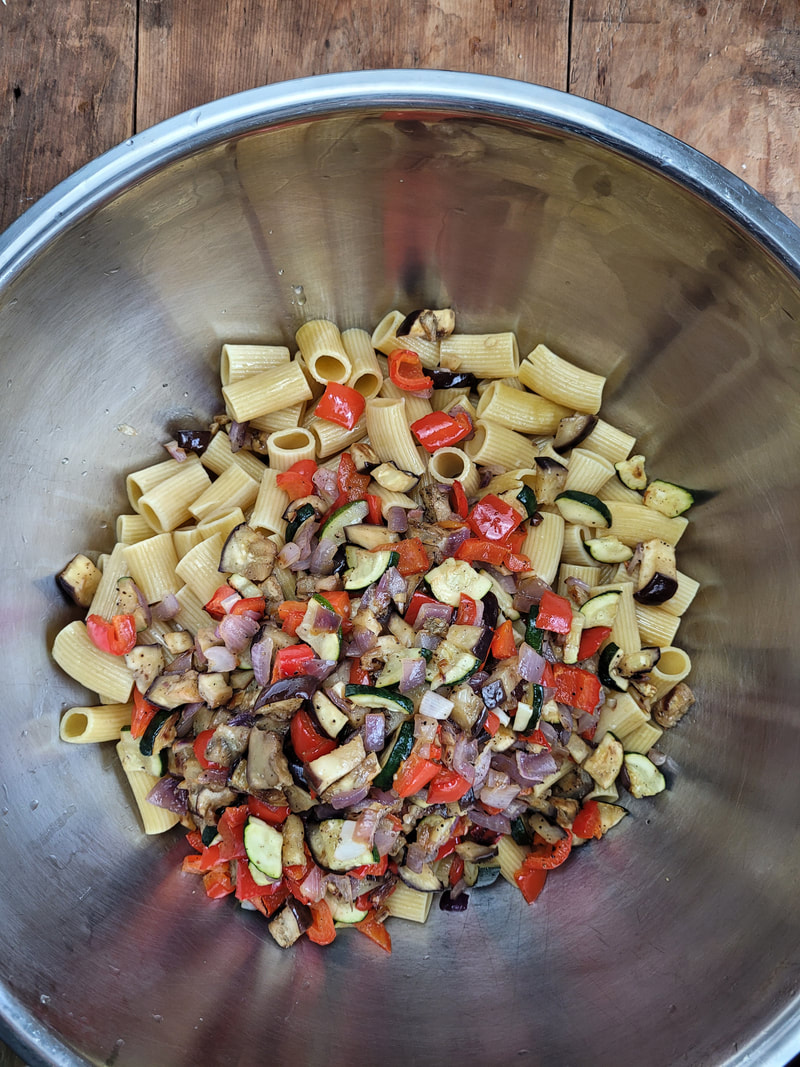
Step 1 : Toss chunked veggies with olive oil, salt, pepper & garlic and roast at 425F until golden. Anywhere from 15-25 minutes depending on your oven and the size of your chunked veg. I don't want the veg crunchy, but not mushy either. They should be softened.
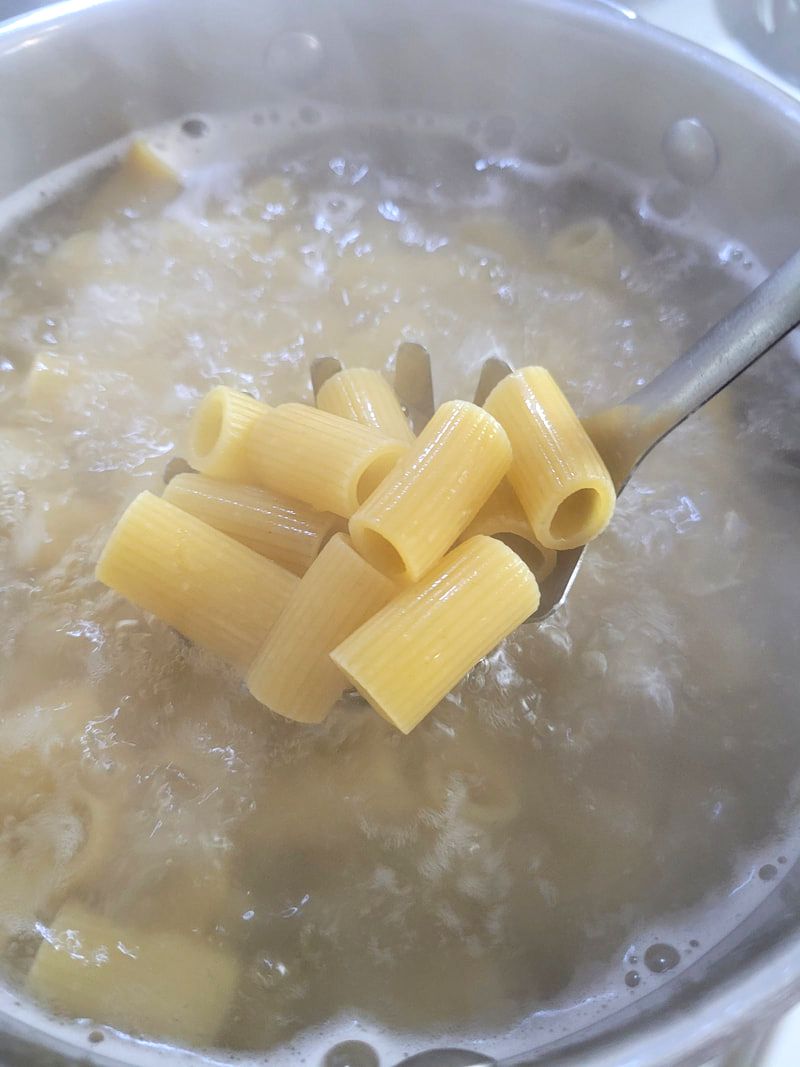
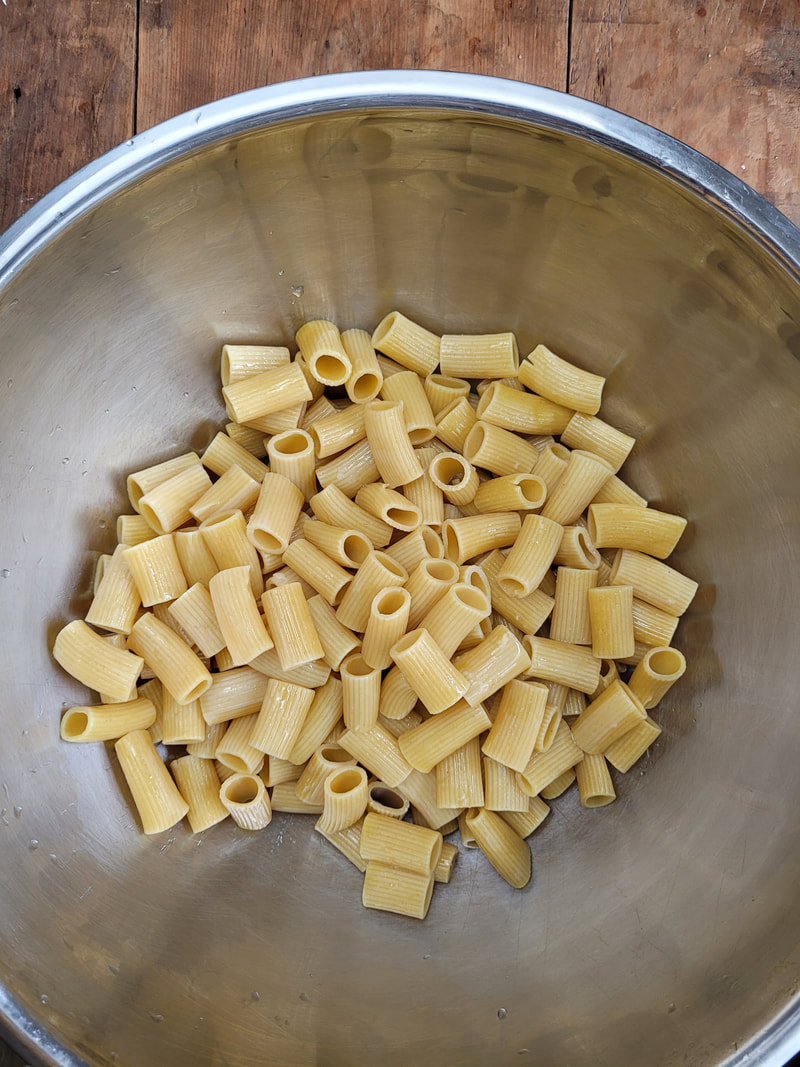
Step 2: Cook rigatoni in boiling salted water, strain, and drizzle with olive oil to prevent sticking. You could use whatever pasta shape you like, but I am really digging the rigatoni in this recipe.
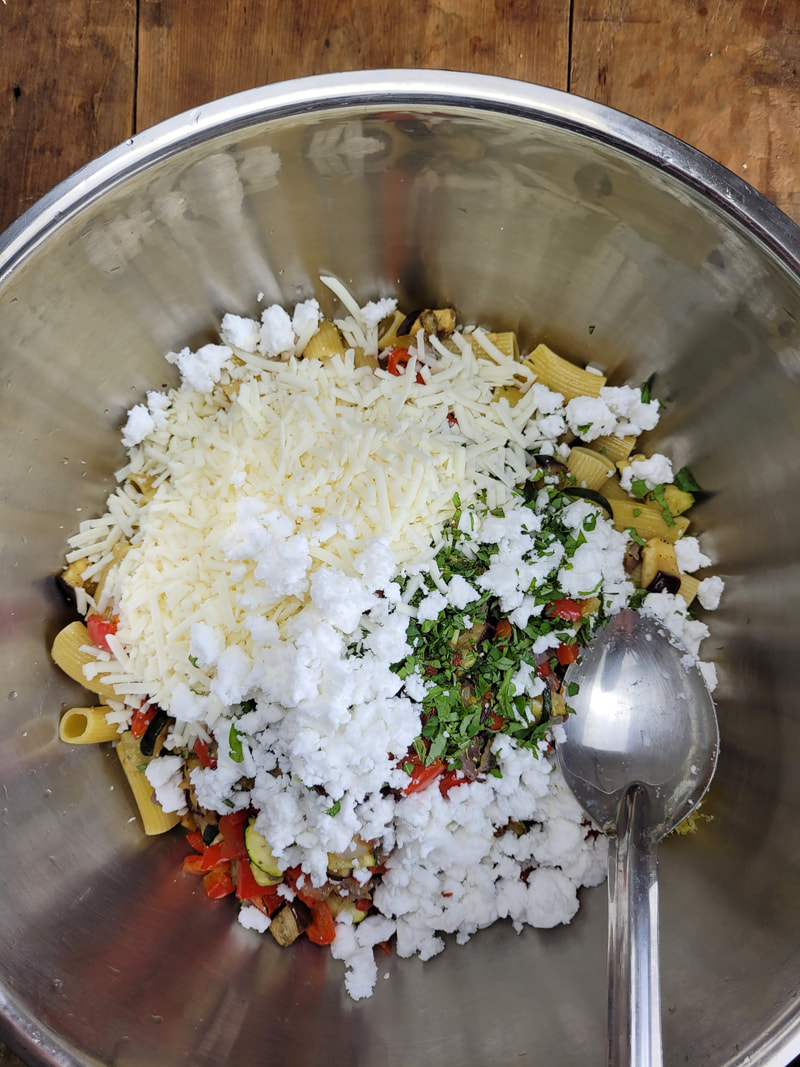
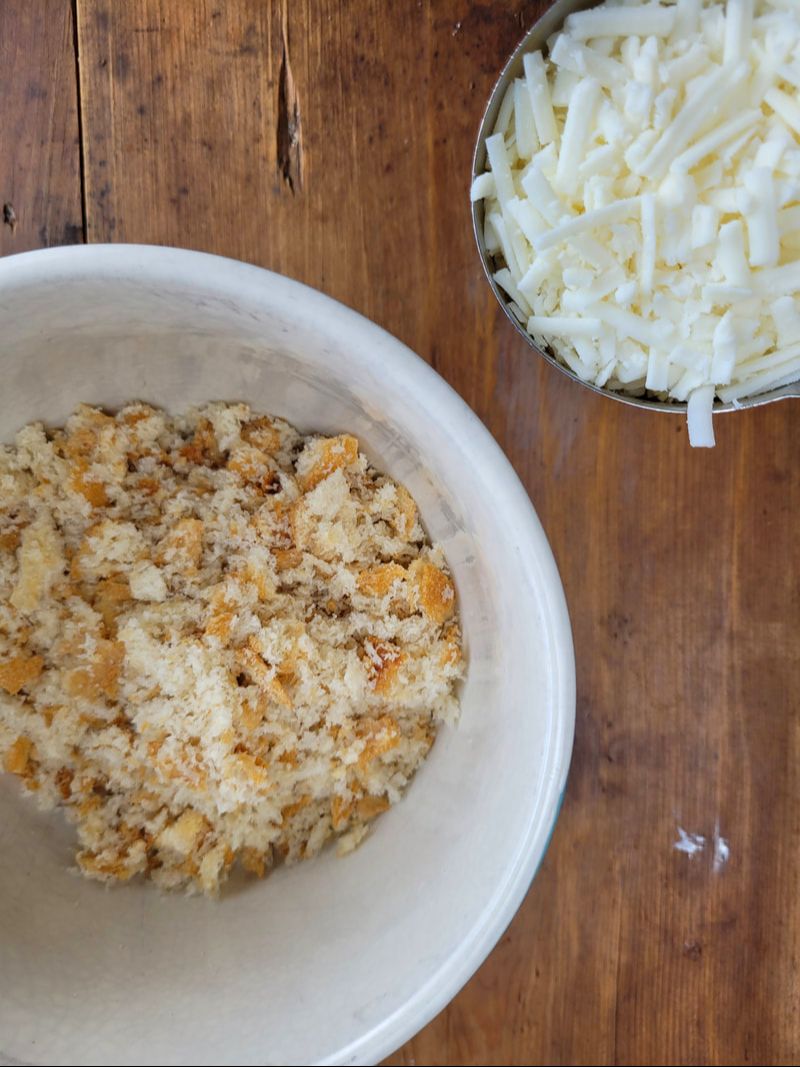
Step 3: Mix together remainder of ingredients in a large bowl. (excluding breadcrumbs, and reserving some grated mozzarella cheese and herbs for bread crumb topping)
Step 4: Once everything is mixed together, add to lightly oiled baking dishes. (9 x 13 inch baking dish or 2-3 smaller ones)
Step 5: Mix up your cheesy crumb topping, spread evenly over pasta and bake at 350F until hot and bubbly. About 40 minutes.
Hey friends! This page contains affiliate links. If you choose to purchase after clicking a link, I may receive a commission at no extra cost to you. Your support means a lot, and I thank you!
|

Author
Hey! I'm Trisha Archives
February 2024
|


 RSS Feed